Adding a backsplash to an RV is one of those upgrades that instantly changes the look and feel of the entire space. Whether you’re trying to brighten up the kitchen, give the bathroom a modern flair, or simply protect the walls from splashes, a well-designed backsplash can make your RV feel more like home. You don’t need to spend a fortune or hire professionals to pull it off either. With a little creativity, the right materials, and some time, you can create a stunning result that reflects your personal style while staying within budget.
Why Add a Backsplash to Your RV
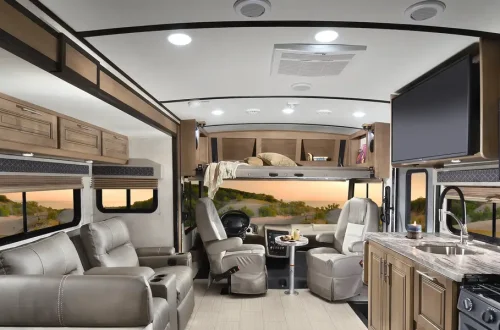
RV interiors often come with plain, utilitarian walls that can feel a bit sterile. Adding a backsplash does more than improve aesthetics, it serves a functional purpose as well. Cooking and washing dishes can easily lead to splashes of water, oil, or food hitting the wall, and without protection, those stains can be tough to remove. A backsplash not only shields those surfaces but also adds texture, color, and personality to the small space.
One of the biggest advantages of doing it yourself is control over materials and costs. You can choose from peel-and-stick tiles, vinyl sheets, wallpaper, reclaimed wood, or even paint to create the exact look you want. The process can be surprisingly simple and satisfying, especially when you see how much of a difference it makes to your RV’s overall vibe.
Measuring and Preparing the Area
Before getting into materials, preparation is key. I always start by measuring the area I plan to cover. For the kitchen, that usually means the space between the countertop and the bottom of the cabinets. In the bathroom, it’s often the wall behind the sink.
Write down the height and width of the area, then multiply them to calculate the total square footage. Adding an extra ten percent to your material estimate helps cover mistakes or future repairs. Once you have your measurements, clean the surface thoroughly. Grease, dust, or moisture can prevent adhesives from sticking properly, so make sure the wall is dry and smooth.
If the wall has any texture or unevenness, lightly sand it down. For glossy finishes, a quick scuff with sandpaper helps adhesives bond better. I also recommend removing outlet covers and any hardware before starting, this makes installation cleaner and more professional looking.
Peel-and-Stick Tiles
Peel-and-stick tiles are easily one of the most popular backsplash options for RVs. They’re lightweight, affordable, and come in a wide variety of designs that mimic stone, glass, or ceramic. They’re also easy to install without special tools.
Start by laying out the tiles on a flat surface to plan your pattern. Once you’re happy with the arrangement, peel off the backing and press each tile firmly against the wall. Use a utility knife or scissors to trim around outlets or corners.
I’ve found that heating the adhesive slightly with a hair dryer helps the tiles stick better, especially in cooler temperatures. The key is applying steady pressure for several seconds to ensure they bond firmly. Peel-and-stick tiles are especially ideal for renters or people who frequently change RV decor, as they can be removed later without damaging the wall.
Vinyl Wallpaper
Vinyl wallpaper is another low-cost way to create a backsplash look. It’s easy to clean, moisture-resistant, and comes in nearly endless patterns, from faux marble to rustic brick. Many RV owners use it to create an upscale look without the weight or cost of real tiles.
Measure and cut your wallpaper to size before peeling off the backing. Apply it slowly, pressing out any air bubbles with a flat edge or credit card. If you want added durability, you can apply a thin clear coat over the wallpaper to protect it from grease and moisture.
The biggest advantage of vinyl wallpaper is flexibility. You can change it whenever you’re ready for a new look. It’s lightweight, so it won’t affect your RV’s overall weight distribution, and it’s affordable enough to redo every couple of years if you enjoy seasonal makeovers.
Painted Backsplash
A painted backsplash might be the simplest option of all, but when done right, it can look just as beautiful as a tiled one. Start by selecting a durable, moisture-resistant paint, satin or semi-gloss finishes work best.
Use painter’s tape to create clean borders and apply a primer suited for your wall material. Once dry, paint the area in your chosen color. If you want to get creative, you can stencil patterns or use masking tape to create geometric designs. A coat of clear polyurethane sealer over the paint will make it easier to wipe down after cooking.
Painted backsplashes are ideal for minimalists or those who want something highly customizable. You can easily change the color to match new decor or refresh your RV’s interior each year.
Reclaimed Wood Backsplash
If you prefer a rustic or farmhouse look, reclaimed wood makes an excellent backsplash material. Old pallets, fence boards, or even leftover flooring can be cut to size and arranged in a horizontal or vertical pattern.
Before installing, sand the boards to remove splinters and apply a clear waterproof sealant. This prevents damage from steam or moisture. Attach the boards using lightweight construction adhesive or small finishing nails. For RVs, I prefer using adhesive, it’s strong enough to hold but flexible enough to handle vibrations on the road.
Reclaimed wood brings warmth and texture to your space. It also adds a sense of character that’s hard to find in store-bought materials. Each piece of wood tells its own story, and that makes the final look feel one-of-a-kind.
Aluminum or Metal Sheets
Metal backsplashes may sound expensive, but aluminum or tin sheets are actually quite budget-friendly. They add a sleek, modern touch and reflect light beautifully, making small RV kitchens appear larger.
Measure and cut the sheets using tin snips, then attach them with adhesive or small screws. Some hardware stores even sell pre-cut panels designed for DIY installations. If you’re concerned about fingerprints or smudges, choose a brushed or textured finish, it hides marks better than polished metal.
One benefit of using metal is durability. It won’t warp from heat or moisture, and it’s incredibly easy to clean. A quick wipe with a damp cloth restores its shine.
Faux Stone Panels
For those who love the look of natural stone but not the cost or weight, faux stone panels are a perfect alternative. Made from lightweight polyurethane, they mimic real stone textures without adding strain to your RV’s structure.
Attach them with construction adhesive and secure edges with finishing nails if needed. Use a utility knife to trim around outlets and edges. While faux stone can be pricier than peel-and-stick or wallpaper options, it’s still much cheaper than genuine stone and far easier to install.
The result is a high-end appearance that gives your RV interior a cozy, homey atmosphere, perfect for mountain or forest camping trips.
Mosaic Backsplash Using Leftover Tiles
If you’ve done any home renovation, you might have leftover tiles sitting in storage. Instead of letting them go to waste, repurpose them into a mosaic backsplash.
Break the tiles into small pieces using a hammer (wrap them in a towel first to avoid flying shards). Arrange the pieces in a pattern on the wall using tile adhesive, then fill the gaps with grout. Wipe away excess grout with a damp sponge before it hardens.
This approach allows for endless creativity. You can combine different colors and textures to create a truly personalized design. Plus, since you’re using leftover materials, it’s practically free apart from adhesive and grout costs.
Using Decals and Stickers
Decorative decals and stickers are great for quick, temporary makeovers. They come in various designs, from subway tiles to intricate Moroccan patterns. While not as durable as tiles or wood, they’re perfect for testing out styles or adding a bit of flair without commitment.
Just peel and stick them on a clean wall, smoothing out bubbles as you go. Some stickers are even heat-resistant, making them suitable for kitchens. When you’re ready for a change, peel them off and start again with a new design.
Combining Materials for a Unique Look
One of my favorite ways to design an RV backsplash is by mixing materials. For example, pairing reclaimed wood with a strip of metal trim gives a nice contrast between rustic and modern. Combining peel-and-stick tiles with painted borders can also create a custom look without added expense.
The key to combining materials successfully is balance. Keep your color palette consistent and avoid overly busy patterns that can overwhelm a small space. Mixing textures within a cohesive theme creates depth and personality.
Installation Tips for a Professional Finish
Even budget projects can look high-end with the right approach. Always start from the center of the wall and work outward to keep patterns symmetrical. Use a level to ensure each row aligns properly, especially with tiles or panels.
Take your time around outlets and corners, those are the spots where uneven cuts are most noticeable. If using adhesive materials, make sure they’re firmly pressed into place to avoid peeling later.
Once everything is installed, clean the surface and reinstall outlet covers or fixtures. A bead of clear silicone caulk along the edges helps seal the area and gives the backsplash a finished appearance.
Cost Breakdown and Savings
Depending on the materials you choose, your DIY backsplash could cost anywhere from $20 to $200. Peel-and-stick tiles typically run about $1 to $3 per square foot, while vinyl wallpaper might cost even less. Reclaimed wood and leftover tiles can often be free, aside from the cost of adhesive.
By doing the work yourself, you avoid labor costs and can reinvest the savings into other RV upgrades. You’ll also gain hands-on experience that makes future projects easier and more enjoyable.
Maintenance and Longevity
Maintaining your backsplash is straightforward. Most materials can be wiped clean with a damp cloth and mild soap. Avoid harsh chemicals that can dull finishes or weaken adhesives.
If a section becomes damaged, it’s usually simple to replace just that piece without redoing the entire backsplash. Regular cleaning keeps the area fresh and prevents buildup from cooking residue or humidity.
Final Thoughts
A backsplash might seem like a small detail, but in an RV, every design choice counts. It’s a chance to express your personality and make your mobile home more inviting without spending a lot of money.
With so many budget-friendly options, from peel-and-stick tiles to reclaimed wood, you can easily find a style that fits your taste and skill level. The best part is that each time you walk into your RV, you’ll see the results of your creativity and effort reflected in a beautiful, functional space.
DIY RV backsplash ideas on a budget aren’t just about saving money, they’re about transforming your RV into a space that feels truly your own. With a bit of imagination and patience, even a small wall can become a statement piece that elevates your entire travel experience.