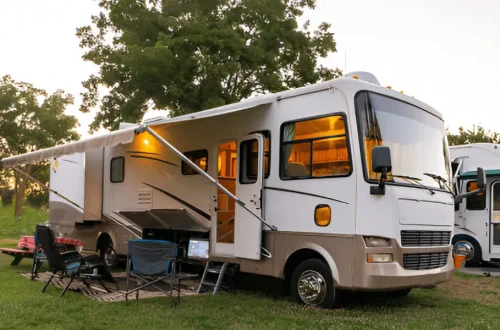
Getting accurate readings from RV tank sensors can be a constant struggle. Whether it’s the fresh water, gray water, or black water tank, unreliable sensors can turn a relaxing road trip into a guessing game. I used to think it was just part of RV life until I discovered that upgrading the tank sensors isn’t as complicated or expensive as most people think. A good DIY upgrade can save frustration, improve convenience, and make maintenance much smoother.
In this guide, I’ll walk you through how to upgrade your tank sensors for accurate readings every time. I’ll cover everything from the reasons behind false readings to a full installation guide, as well as some tips that will help you get professional results without paying professional prices.
Why Standard RV Tank Sensors Fail
Most RVs come with basic factory-installed tank sensors that use metal probes inside the tanks to measure levels. These sensors are often exposed to all sorts of buildup from soap, grease, toilet paper, and waste. Over time, residue on these probes causes false readings, making your monitor panel think a tank is full when it’s actually half empty, or vice versa.
The biggest issue is that these traditional sensors rely on direct contact with the tank’s contents. Once buildup accumulates, accuracy goes out the window. Even after cleaning, the problem tends to return quickly. That’s why many RV owners eventually switch to external or more advanced monitoring systems.
Benefits of Upgrading Your Tank Sensors
A sensor upgrade transforms your RV experience by eliminating guesswork and reducing maintenance headaches. Modern sensors use advanced technology like ultrasonic or external stick-on sensors that never touch the contents inside the tank.
Here’s what you gain with a proper upgrade:
- Accurate Readings: You’ll always know the true levels in your tanks, allowing for smarter water use and waste management.
- Low Maintenance: With no internal probes, there’s nothing to clean or replace regularly.
- Long Lifespan: High-quality external sensors can last years with minimal upkeep.
- Better Planning: Knowing your tank levels helps you plan stops and avoid emergencies while traveling.
For RVers who enjoy dry camping or boondocking, this upgrade can be especially valuable since you depend on your tank capacity more than ever.
Choosing the Right Sensor Upgrade
Not all sensors are created equal. Depending on your RV model, tank material, and budget, there are a few popular options worth considering.
The most common upgrade options include:
- External Adhesive Sensors: These attach to the outside of your tanks and read levels through the wall using ultrasonic technology.
- Capacitive Sensors: Similar to external sensors but slightly more advanced, these can measure liquid levels without direct contact and often provide digital readings.
- Aftermarket Probes: If you prefer internal probes, some brands offer improved designs with shielded tips that resist buildup and corrosion.
Before purchasing, check your tank’s material, some sensors work better on plastic tanks than metal ones. Also, ensure that the system you select is compatible with your RV’s existing monitor panel or comes with a new display unit.
Tools and Materials You’ll Need
A tank sensor upgrade doesn’t require special equipment. Most installations can be handled with simple tools and a bit of patience. You’ll need:
- New sensor kit (external or internal depending on your choice)
- Cleaning supplies (soap, water, rags)
- Screwdrivers and wire strippers
- Electrical tape or heat shrink tubing
- Measuring tape
- Drill (only if installing new display panel or internal probes)
- Wire connectors or soldering tools
Having everything ready before you start makes the job much easier and faster.
Preparing the RV for Installation
Before installing your new system, give your tanks a thorough cleaning. Even if you’re switching to external sensors, having clean tanks ensures accurate calibration. Use a tank cleaning wand or a specialized cleaner for black and gray water tanks to remove debris and residue.
Next, locate your tanks and monitor wiring. Most RVs have tanks mounted beneath the floor, with the wiring accessible through panels or underneath the chassis. If your setup is enclosed, you may need to remove a few screws or access panels to reach them.
Removing the Old Sensors
If your RV uses standard probe-style sensors, start by disconnecting the power to avoid electrical hazards. Remove the existing sensors by carefully detaching their wires and unscrewing or unclipping them from the tanks.
Inspect the wiring and connectors for corrosion or damage. If the wires look frayed, replace them to ensure proper conductivity for the new system. Labeling the wires as you remove them helps keep everything organized when installing the new sensors.
Installing External Adhesive Sensors
For many RV owners, adhesive sensors are the easiest upgrade option. They don’t require drilling or direct tank access, and installation can be done in under an hour.
Start by cleaning the outside surface of the tanks thoroughly. Dirt or residue can prevent the adhesive from sticking properly. Measure and mark the correct height positions for each sensor pad according to the manufacturer’s instructions. Typically, sensors are placed at intervals to measure empty, one-third, two-thirds, and full levels.
Once positioned, peel off the backing and press each sensor pad firmly onto the tank. Run the wires neatly along the tank’s surface and secure them with clips or zip ties to prevent them from hanging loosely. Connect the wires to your monitor panel or control module, ensuring that connections are tight and properly insulated.
Installing Internal or Probe-Style Sensors
If you’ve chosen upgraded probe-style sensors, the process will involve more hands-on work. You’ll need to drill small holes in your tank at the appropriate levels if there aren’t existing ones.
Insert the new probes according to the instructions, ensuring a watertight seal around each connection. Use silicone or rubber gaskets to prevent leaks. Connect the wires to your monitoring system, matching each probe to the correct indicator on your display panel.
Once installed, test each sensor by filling the tank gradually with water and verifying that the display shows the proper levels.
Wiring and Display Setup
Most modern sensor kits come with a new digital display panel that offers more accurate and user-friendly readings. Mount the display in a convenient location inside your RV, typically near the control center or kitchen area.
Run the wires from the tanks to the display panel, securing them along the walls or beneath flooring to avoid loose cables. Use electrical tape or heat shrink tubing to cover connections and protect them from moisture. Double-check polarity and connections before powering the system on.
Calibrating the Sensors
Calibration is crucial to ensure the readings are accurate. Follow the manufacturer’s guide to set the empty and full parameters. For external sensors, this often involves pressing calibration buttons while the tank is empty and again when it’s full.
Run a test by filling your fresh water tank to different levels and observing the changes on your display. Repeat this for gray and black tanks. If any readings seem off, recheck the sensor placement or recalibrate as needed.
Maintenance Tips for Long-Term Accuracy
Even though upgraded sensors require less maintenance, occasional checks help keep them reliable. Clean the tanks every few months using RV-safe cleaners. Avoid harsh chemicals that could damage the sensors or tank material.
Inspect the wiring annually for wear or corrosion, especially if you often travel in humid or wet environments. If you have external sensors, make sure the adhesive remains secure. Reapply if you notice any loosening.
Common Installation Mistakes to Avoid
Many RV owners run into issues simply because of small oversights. Avoid these mistakes for a smoother upgrade:
- Placing sensors on dirty or uneven tank surfaces
- Forgetting to calibrate after installation
- Mixing up the wiring between tanks
- Using the wrong type of sensor for your tank material
- Skipping waterproofing on electrical connections
Taking your time and following the manufacturer’s steps carefully can save you hours of troubleshooting later.
Cost Breakdown and Value
Upgrading your tank sensors doesn’t have to break the bank. Most high-quality external systems range from $150 to $300, and you can often install them yourself without paying for professional labor.
When you consider the convenience, accuracy, and reduced maintenance, the cost is well worth it. You’ll spend less time cleaning and guessing and more time enjoying your travels with confidence.
Why a DIY Upgrade is Worth It
Doing this upgrade yourself gives you a sense of control over your RV systems. You’ll understand how everything connects, making future troubleshooting easier. It also saves money compared to hiring a technician, who could charge several hundred dollars for installation.
Besides, once you complete it successfully, you’ll likely find other DIY projects less intimidating. The process builds confidence in maintaining and improving your RV.
My Personal Experience with the Upgrade
After years of unreliable readings, upgrading to external sensors was one of the best RV decisions I’ve made. The difference was immediate, no more guessing whether the gray tank was about to overflow or worrying about running out of fresh water in the middle of nowhere.
The new system gave me precise readings, even after months of use. Maintenance became easier, and my entire setup felt more efficient. For anyone tired of inconsistent tank levels, this project is one that truly pays off.
Final Thoughts
Accurate tank readings may not sound exciting, but they make a huge difference in how smoothly your RV adventures go. By upgrading your sensors, you eliminate unnecessary stress and create a more reliable, efficient home on wheels.
A DIY tank sensor upgrade isn’t complicated, it just takes patience, the right tools, and attention to detail. Once you’re done, you’ll wonder why you didn’t make the change sooner. It’s one of those small investments that brings lasting peace of mind every time you hit the road.