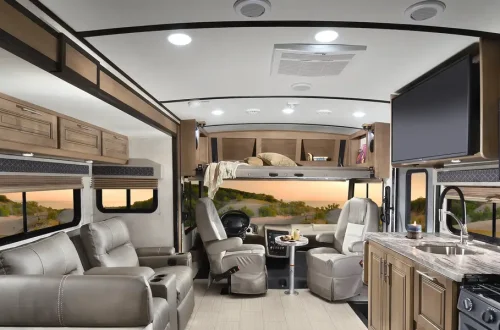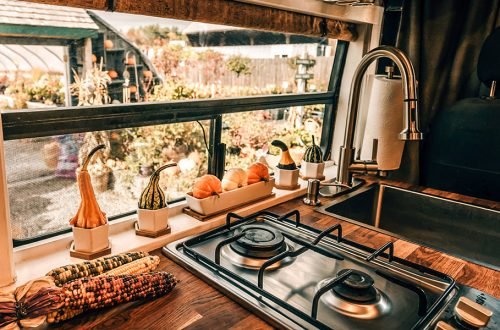
Space is always a premium inside an RV. Every inch has to count, especially in the kitchen area where clutter can quickly make things feel cramped. Trash bins, while essential, often take up valuable floor space or disrupt the flow of your beautifully organized galley. That’s why creating a hidden trash bin is one of the smartest and most rewarding DIY projects for any RV owner. It keeps your space tidy, maintains your interior aesthetic, and adds a touch of clever design that makes daily living much easier.
In my RV, I found that having a visible trash bin made the kitchen feel crowded and messy no matter how clean I tried to keep it. So I decided to build a hidden trash bin setup that fit perfectly under my counter and out of sight. The transformation was more impactful than I expected, and I want to share exactly how to plan and execute a similar project in your RV.
Planning Your Hidden Trash Bin
The success of this project depends heavily on good planning. You’ll need to think about the layout of your RV kitchen and identify where you can tuck a bin without compromising functionality. Most people find under-sink cabinets or lower kitchen drawers ideal for this kind of setup.
I started by measuring the available space under my sink and checking if it could fit a small pull-out bin. If you don’t have an under-sink area that can accommodate it, a lower drawer beside the stove or a small side cabinet can work just as well. Make sure to account for plumbing, wiring, and existing fixtures before committing to any spot.
Once you have the perfect location, consider the type of trash bin you want to install. You can use a sliding drawer mechanism that holds one or two bins, a tilt-out panel for a cleaner look, or even a hidden compartment inside a cabinet door. Think about how you usually dispose of trash when cooking and pick a design that makes it easy to access without extra steps.
Gathering Materials and Tools
For this project, you’ll need some basic tools and supplies that are easy to find at any hardware store or RV supply shop. Here’s what I used:
- A small to medium-size plastic trash bin (measure to ensure it fits your cabinet)
- Drawer slides or a pull-out track system
- Screws and brackets
- Drill and screwdriver
- Measuring tape
- Pencil for marking measurements
- Wood glue (optional for added stability)
- A small piece of plywood or board if you’re creating a custom base
Depending on your RV’s cabinetry, you may need a jigsaw or a multi-tool to adjust the opening or cut a piece of wood for the mounting base.
Measuring and Prepping the Cabinet
Start by removing everything from the cabinet where you plan to install your hidden trash bin. Measure the internal dimensions carefully, height, width, and depth. Then measure your bin and make sure it will slide in and out easily without scraping the walls or hitting the pipes.
I recommend leaving an inch or two of clearance above the bin so you can easily remove and replace the trash bag. If your chosen space doesn’t have enough depth for a full-size bin, consider using a slim or rectangular container instead. The goal is functionality, not just aesthetics.
After confirming that your bin fits, mark where you’ll install the drawer slides or mounting base. Use a pencil to draw straight, level lines on both sides of the cabinet interior. Accuracy here ensures smooth operation later.
Installing Drawer Slides
If you’re using drawer slides, measure the exact height you want the bin to sit at, then attach one slide to each side of the cabinet. Use a drill to pre-drill holes before inserting screws to avoid splitting the wood. Once both slides are secured, attach the matching slide pieces to the sides of your bin’s platform or to a small board that will hold the bin.
Slide the platform into place to test the movement. It should glide smoothly without wobbling. If it feels too tight or uneven, loosen the screws slightly, adjust, and re-tighten until it works perfectly.
For a tilt-out design, you’ll need to attach hinges at the bottom of the cabinet door and connect the bin to the inner side of the door with a small bracket. When you pull the door open, the bin tilts out for easy access. It’s a clever alternative that works well if your RV’s cabinetry doesn’t allow for slide rails.
Securing the Trash Bin
Once the structure is in place, it’s time to secure the bin. You can either let it sit freely on the platform or fasten it with small clips or Velcro strips to keep it from moving while driving. I personally prefer using a small rubber mat underneath, it keeps the bin stable and prevents rattling when the RV is on the road.
If your design includes two bins (one for trash and one for recyclables), consider dividing the platform using a small wooden separator. This keeps both containers in place and makes waste sorting much simpler.
Adding Finishing Touches
After installation, check how the door or drawer closes. If it rubs or doesn’t shut completely, adjust the placement slightly. Once satisfied, you can paint or stain the visible wood to match your cabinet interior. A small magnetic catch or soft-close mechanism can also make the setup feel more polished.
For those who prefer an extra clean look, consider lining the inside of the cabinet with peel-and-stick wallpaper or contact paper. It makes cleaning easier and gives your RV kitchen a custom feel.
Managing Odors and Hygiene
A hidden trash bin can trap odors if not managed well, especially in the confined space of an RV. To prevent smells from building up, use tight-sealing trash bags and empty them frequently. You can also place a small charcoal deodorizer or baking soda packet at the bottom of the bin to neutralize any lingering scents.
I’ve found that having a small container of disinfectant wipes nearby makes it easy to clean the bin and surrounding area regularly. Keeping everything sanitized not only helps with odor control but also maintains a pleasant environment for cooking and relaxing inside the RV.
Creative Design Variations
There are many ways to personalize your hidden trash bin project. Some people install small sliding doors at the end of a kitchen island or build compartments into bench seating. If your RV layout allows it, a vertical pull-out design, similar to spice racks, can be a space-saving option for narrow cabinets.
You can even repurpose old furniture or leftover wood from other projects to create a rustic look that matches your RV’s interior theme. For those who like a modern touch, use brushed aluminum handles and a smooth glide system for effortless operation.
If you’re handy with power tools, adding a soft-close drawer slide elevates the whole setup. It gives the feel of a high-end kitchen upgrade without the hefty cost.
Maintenance and Upkeep
Once your hidden trash bin is up and running, maintenance is minimal but essential. Check the screws and slides periodically to ensure nothing has loosened due to road vibration. A quick tightening session every few months keeps the mechanism secure.
Clean the bin regularly with warm water and mild detergent, and don’t forget the surrounding surfaces. RV kitchens are smaller than household kitchens, so any lingering grime or odor can spread quickly.
I also recommend rotating or replacing your bin once a year if it starts to show signs of wear. Plastic can absorb odors over time, and keeping things fresh contributes to the overall cleanliness of your RV.
Why This Upgrade Is Worth It
Adding a hidden trash bin may seem like a small improvement, but it has a noticeable impact on daily comfort. It reduces clutter, frees up floor space, and gives your kitchen a more cohesive look. Beyond aesthetics, it also enhances efficiency. When preparing meals, you can easily pull out the bin, dispose of waste, and slide it back without disrupting your cooking flow.
More importantly, this project helps maintain the RV’s livability over time. A clean and organized kitchen makes long trips more enjoyable, and small upgrades like this one can even increase your RV’s resale value.
Final Thoughts
Building a hidden trash bin in your RV kitchen isn’t just about convenience, it’s about creating a smoother, more enjoyable way to live on the road. This DIY project combines practicality with creativity, offering a custom solution that fits your specific space and lifestyle. Once you complete it, you’ll wonder how you ever managed without it.
For me, the hidden trash bin was one of those small upgrades that transformed the entire kitchen. It eliminated visual clutter and made cleanup during meals effortless. Every time I slide that bin out, I’m reminded how a bit of thoughtful design can make RV living feel less like roughing it and more like home.
By putting in a few hours of work and some inexpensive materials, you can achieve a neat, efficient, and stylish solution that truly elevates your RV kitchen. It’s a project that blends function and satisfaction, one pull at a time.