Water leaks are one of the most frustrating issues to deal with in an RV. They seem to appear out of nowhere, and if ignored, they can cause costly damage to walls, floors, and ceilings. Over the years, I’ve realized that the best way to handle RV water leaks is to act quickly and methodically. Once you know what to look for and how to fix it, managing leaks becomes much less intimidating. Here’s how I handle common RV water leaks and prevent them from returning.
Inspecting the Source of the Leak
The first step is identifying where the water is coming from. Leaks in an RV can be tricky since water travels along surfaces before it finally drips or pools somewhere visible. I start by inspecting the most common areas: the roof, windows, water lines, and plumbing fixtures.
If I notice water on the floor, I check the direction of the flow or moisture trails. Sometimes, I’ll use a dry cloth or paper towel to trace where the dampness begins. This helps narrow down the source instead of just treating the symptoms. I also use a flashlight to inspect corners, cabinets, and under sinks, especially if the leak happens after using the shower or kitchen.
In some cases, I’ll turn off the main water supply and watch whether the leak slows down or stops. If it continues, it’s likely from rainwater or condensation. If it stops, it’s a plumbing or fixture-related issue. This simple test helps me know where to focus my repair efforts.
Fixing Roof Leaks
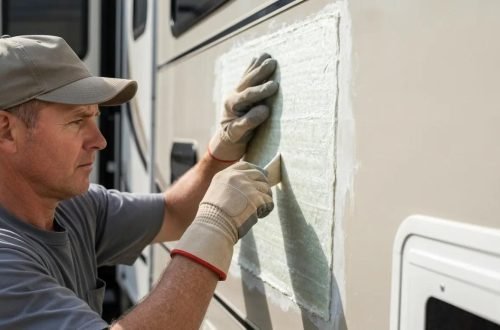
The roof is one of the most common sources of leaks in RVs. Exposure to sun, rain, and wind can cause sealants to crack or wear out over time. When I spot a roof leak, I start by cleaning the area with mild soap and water, then letting it dry completely. Once dry, I apply an RV roof sealant or patch kit compatible with the roof material, rubber, fiberglass, or aluminum.
For small cracks, I use self-leveling lap sealant since it spreads evenly and creates a watertight finish. If the damage is more extensive, I’ll use roof repair tape. It’s strong, flexible, and ideal for sealing seams or larger holes. I make sure to press it firmly and smooth out any air bubbles to prevent future leaks.
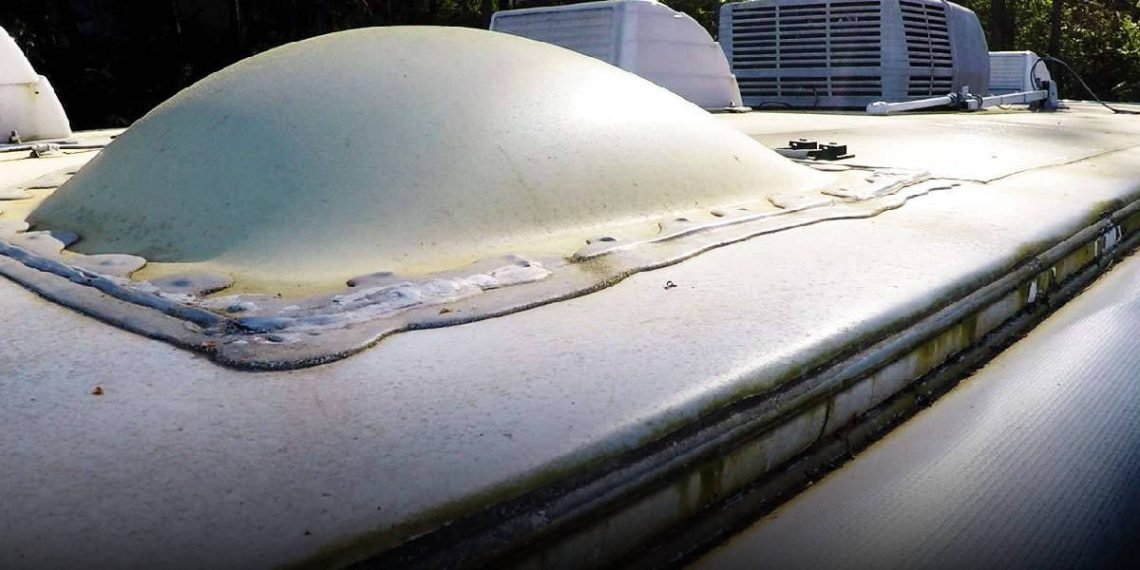
I’ve also learned that regular roof inspections are crucial. Every few months, I walk the roof, checking around vents, skylights, and air conditioners. These are weak points that often develop leaks first. Preventing roof leaks early saves me from major interior damage later.
Addressing Window and Door Leaks
Windows and doors can let in water during heavy rain or when seals wear down. If I notice water around a window frame, I inspect the caulking and rubber gaskets. Cracks or gaps are a clear sign they need replacement.
To fix it, I remove the old caulk using a plastic scraper, clean the surface, and apply a fresh bead of RV sealant designed for exterior use. I make sure to apply it evenly and let it cure fully before testing with water. For rubber gaskets that have become brittle, I replace them with new ones and apply a thin layer of silicone lubricant to keep them flexible.
In some cases, the problem isn’t the seal but poor drainage. I check the weep holes at the base of the windows to make sure they’re not clogged. Clearing these small openings prevents water from collecting inside the window frame and leaking into the RV.
Fixing Leaky Plumbing Connections
Leaks in the plumbing system can appear under sinks, around faucets, or behind walls. These are usually caused by loose fittings, worn-out washers, or cracked hoses. When I spot a plumbing leak, I turn off the water pump and relieve pressure from the system.
I start by tightening any visible connections by hand or with a wrench, being careful not to over-tighten and damage the fittings. If that doesn’t work, I inspect the washer or O-ring inside the fitting. Replacing these small parts often solves the problem. For plastic water lines, I sometimes use push-to-connect fittings, which are easy to install and reliable for quick fixes.
If the hose itself is cracked or split, I cut out the damaged section and reconnect the line using a coupling. It’s a straightforward repair that doesn’t take long but prevents bigger leaks later. After making repairs, I turn the water back on and check for drips before closing the compartment.
Repairing Leaks in the Shower and Bathroom
The bathroom can develop leaks around the shower pan, faucet, or toilet. I usually start by inspecting the caulk around the shower base and walls. If it’s peeling or missing, I scrape it off, dry the area, and reapply a waterproof sealant.
Leaky faucets are often due to worn-out cartridges or washers. I shut off the water, disassemble the faucet, and replace the damaged parts. For the toilet, leaks usually happen at the water connection or the base. If water seeps from the base, I replace the flange seal or tighten the bolts holding the toilet down.
Another thing I check is the vent pipe that runs through the roof from the bathroom. If the seal around it cracks, rainwater can run down and appear as a bathroom leak. Sealing the vent base with RV roof sealant fixes the issue quickly.
Fixing Freshwater Tank Leaks
If the leak is from the freshwater tank, it might be due to a loose fitting or a crack in the tank itself. I first check the fittings for tightness and replace any damaged hose clamps. For small cracks, I use a plastic epoxy or a patch kit made for water tanks. These create a strong, waterproof seal once cured.
If the crack is large, I usually consider replacing the tank entirely. It’s not worth risking contamination or constant dripping that could damage the floor. After the repair, I fill the tank halfway and monitor for any leaks before using it again.
Dealing with Grey and Black Tank Leaks
Wastewater tanks are another source of trouble, especially at the connections or valves. I inspect the drain valves and fittings for signs of leakage. Sometimes, tightening the clamps or replacing worn-out seals around the valve fixes the issue.
If the tank itself has a small puncture, I use an ABS plastic repair kit. I sand the area lightly, apply the adhesive patch, and let it cure fully. It’s important not to rush this process since a poorly bonded patch will eventually leak again.
For severe damage, I remove the tank and take it to a professional repair shop. Waste tanks can be tricky to handle, and ensuring they’re properly sealed is critical for hygiene and odor control.
Repairing Leaks Around Slide-Outs
Slide-outs add valuable space but are also prone to leaks if the seals wear out. I inspect the rubber seals around the slide-out edges for cracks, flattening, or misalignment. If I spot any damage, I replace the seal and clean the surrounding area thoroughly.
For minor gaps, I use sealant tape to reinforce the edges and keep moisture out. I also make sure to lubricate the slide seals regularly to keep them flexible and prevent cracking. During heavy rain, I extend the slide slightly and inspect the top corners since water often pools there.
Checking for Hidden Leaks
Not all leaks are visible right away. Sometimes, slow drips behind walls or under flooring can go unnoticed for weeks. I use a moisture meter to detect hidden damp spots. This small tool has saved me from discovering mold growth too late.
I also pay attention to signs like soft spots on the floor, bubbling wallpaper, or a musty smell. These usually indicate water damage beneath the surface. Fixing hidden leaks might require removing panels or flooring, but it’s better to catch them early before structural damage sets in.
Preventing Future Leaks
Once I’ve fixed a leak, I focus on preventing new ones. Regular inspections are my best defense. I check seals, caulking, and connections every few months and after long trips. I also clean the roof and apply protective coatings annually.
Another helpful step is installing an inline water pressure regulator. It prevents excessive pressure from damaging pipes and fittings, which is a common cause of leaks in campgrounds with inconsistent water pressure. I also make sure to winterize the RV properly. Frozen water lines are one of the leading causes of leaks, and draining the system before storage saves me a lot of trouble in spring.
Tools I Keep for Leak Repairs
Having a basic repair kit on hand makes dealing with leaks much easier. My kit includes sealant, roof repair tape, epoxy, plumber’s tape, a wrench, replacement washers, and a moisture meter. I also carry extra hose clamps, a caulking gun, and a flashlight for tight spaces.
For quick fixes on the road, I use self-fusing silicone tape. It creates a strong temporary seal on hoses or fittings until I can make a permanent repair. These tools have saved me from cutting a trip short more than once.
Final Thoughts
Fixing RV water leaks is all about being proactive and patient. Once you know how to spot the signs and tackle repairs systematically, it becomes a manageable task rather than a dreaded chore. Most leaks start small, and catching them early prevents costly repairs down the road.
I’ve learned that a little routine maintenance, like resealing, tightening connections, and checking seals, goes a long way toward keeping the RV dry and comfortable. Water damage is one of the few problems that can quietly ruin an RV over time, but with the right approach, it’s completely preventable. By staying attentive to the signs and knowing how to fix them, I keep my RV ready for adventures without worrying about unwanted drips or damp surprises.