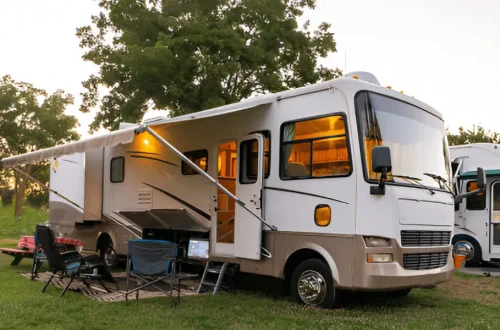
Driving an RV offers an incredible sense of freedom, but maneuvering such a large vehicle can be nerve-wracking, especially when reversing into tight spaces or navigating crowded campgrounds. A backup camera changes everything, it gives you a clear view of what’s behind your rig, reduces blind spots, and makes parking or towing much safer. Installing one might sound intimidating, but with a bit of patience and the right tools, it’s a project you can absolutely handle yourself.
Installing a backup camera on your RV not only enhances safety but also adds convenience to every trip. It helps prevent accidents, makes hitching up a trailer easier, and gives peace of mind when driving in reverse. I’ll take you through every step of how to install a backup camera on your RV, from choosing the right system to wiring it properly and testing the final setup.
Why Install a Backup Camera on Your RV
When driving an RV, visibility is limited by size and design. Rear blind spots are far more significant than in a regular car, making it challenging to gauge distances or spot small obstacles. A backup camera eliminates guesswork by showing exactly what’s behind you.
Safety is the biggest advantage. Whether you’re backing into a campsite, reversing at a gas station, or monitoring traffic behind your trailer, the camera offers an extra layer of security. It also makes solo travel easier since you don’t need someone outside the vehicle directing you.
Another benefit is convenience. Modern systems can connect wirelessly to a monitor in your dashboard, giving real-time visuals without complicated wiring. Plus, many models include night vision and wide-angle lenses, ensuring you have a clear view day or night.
Selecting the Right Backup Camera System
Not all backup cameras are built the same, and choosing one that suits your RV is important for performance and reliability. The two main types are wired and wireless systems.
A wired system connects the camera directly to the display via cables. It offers a stable video signal with minimal interference, which is especially useful for long RVs. The downside is the installation can be more involved since it requires running wires through the length of the vehicle.
Wireless systems, on the other hand, transmit video via radio waves. They are easier to install since they eliminate most of the wiring, but the signal can sometimes weaken over long distances or when obstructed by thick walls. Modern wireless cameras have improved greatly and now deliver clear and consistent images, especially when using digital transmission.
When choosing a system, consider image resolution, viewing angle, night vision capability, and water resistance. RVs face varying weather conditions, so ensure your camera is rated for outdoor use. Also, decide whether you want a standalone monitor or a system that integrates with your existing dashboard display.
Gathering Tools and Materials
Before starting the installation, make sure you have all necessary tools and materials ready. This prevents interruptions midway through the project. You’ll need:
- Backup camera kit (camera, monitor, power cables, mounting brackets)
- Power drill and bits
- Screwdrivers
- Electrical tape
- Wire strippers and connectors
- Zip ties
- Voltage tester
- Silicone sealant for waterproofing
Having everything organized will make the process smoother and faster.
Finding the Ideal Mounting Spot
Most RV owners install the backup camera near the top center of the rear wall, just above the license plate or the rear window. This spot provides a balanced field of view, covering both the ground and the surrounding area.
If your RV has a rear ladder, you might mount the camera at the top for an elevated perspective. Some prefer installing it just above the rear bumper to get a closer view when reversing into tight spaces. Ultimately, the goal is to have a clear, unobstructed line of sight.
Mark the mounting point with a pencil before drilling. Take care to ensure there are no hidden wires or structural components behind the area where you plan to install the camera.
Drilling and Mounting the Camera
Once you’ve identified the mounting spot, drill a hole for the camera’s wiring. Be cautious with your drill bit size to avoid damaging the surrounding surface. Feed the power and video cables through the hole and secure the camera bracket with screws.
After mounting, seal around the drilled hole using silicone to prevent water leaks. This step is essential since moisture can damage both the camera and your RV’s walls over time.
Make sure the camera is aligned correctly before tightening all screws. You can make fine adjustments later once the video feed is visible on your monitor.
Routing the Wires
Wiring is usually the most time-consuming part of installing a backup camera on your RV, especially if you’re working with a wired system. The goal is to route the cables from the rear camera to the monitor in the front without leaving them exposed.
For wired systems, trace the route along existing wiring channels or under the vehicle’s frame. Use zip ties to keep the wires neatly in place. Avoid running cables near heat sources, sharp edges, or moving parts that could cause wear over time.
Wireless systems require far less routing since they only need power for the camera and monitor. You’ll simply connect the camera to a power source near the rear lights and pair it with the monitor in the front.
Connecting Power and Ground
The camera typically needs a 12V power supply, which you can tap from the RV’s rear lights or reverse light circuit. This ensures the camera activates automatically when you shift into reverse.
Use a voltage tester to identify the correct wire and splice into it carefully. Secure the connection using wire connectors and cover with electrical tape for insulation. Connect the ground wire to a clean, unpainted metal surface on the RV frame to ensure stable grounding.
If you want the camera to remain on continuously rather than just in reverse, connect it to a constant 12V power source instead. This setup can be helpful for monitoring traffic behind you while driving.
Installing the Monitor
Depending on your chosen system, the monitor can be mounted on the dashboard, windshield, or integrated into the existing infotainment system. Mount it where it doesn’t obstruct your view but remains easily visible while driving.
Many monitors attach with suction cups or adhesive pads, making placement flexible. Run the monitor’s power cable to a nearby power outlet or fuse box. If it connects via a wired system, attach the video cable from the rear camera to the monitor input.
Once all connections are in place, power on the monitor and check if it receives a signal from the camera.
Pairing and Testing the System
For wireless systems, you’ll need to pair the camera and monitor according to the manufacturer’s instructions. This usually involves setting both devices to the same channel or pressing a sync button.
With everything connected, turn on your RV and shift into reverse. The monitor should display the camera feed immediately. Check for clarity, brightness, and any signal interference. Adjust the camera angle if needed until you achieve the best view of your rear surroundings.
If the image doesn’t appear, verify that all connections are secure and that the power source is working. In some cases, interference or low voltage can disrupt the signal, so double-check wiring and grounding points.
Securing and Hiding Cables
Once the system works properly, take a few extra minutes to tidy up your wiring. Use zip ties to bundle loose cables and secure them to existing wire harnesses. Hiding cables behind panels or inside conduits gives your installation a professional, clean look.
This step not only improves aesthetics but also protects wires from potential damage. Proper cable management ensures the system remains reliable for years.
Waterproofing and Finishing Touches
Since RVs are constantly exposed to outdoor elements, waterproofing your installation is crucial. Apply a generous layer of silicone sealant around all drilled holes, screw heads, and cable entry points.
If your camera comes with a weatherproof housing, ensure it’s properly fitted. For wired systems, use waterproof connectors or wrap exposed joints with electrical tape.
Take this opportunity to clean the camera lens and make sure no debris is obstructing its view. A small maintenance check before every trip will keep your backup camera working efficiently.
Enhancing Functionality with Additional Features
Once your basic backup camera is installed, you might consider adding extra features to improve functionality. Some advanced systems allow multiple camera inputs, giving you a full 360-degree view around your RV. You can install side cameras for lane changes or a front camera for navigating narrow campsites.
Another option is integrating the system with your RV’s GPS or infotainment display, eliminating the need for an additional monitor. Many new models also offer Bluetooth connectivity, motion sensors, and DVR recording capabilities for added safety.
If your system supports these upgrades, they can be added later without redoing the main wiring, making the setup scalable as your needs evolve.
Common Installation Mistakes to Avoid
Even with clear instructions, a few mistakes can make installation frustrating or cause poor performance. Avoid connecting to the wrong power source, as it may cause the camera to stay on constantly or fail to power up.
Don’t skip sealing drilled holes or securing cables, since moisture and vibration can quickly lead to electrical issues. Also, make sure the camera angle isn’t too high or too low; otherwise, it won’t provide an accurate view of obstacles.
Lastly, always test your setup before permanently mounting the monitor or concealing wires. It’s much easier to correct issues early than to disassemble everything later.
Final Thoughts
Installing a backup camera on your RV is one of those upgrades that pays off immediately. It makes every drive safer, every parking job smoother, and every trip less stressful. The installation process takes some time and patience, but the results are absolutely worth it.
Having that extra view behind the RV not only boosts confidence but also prevents costly accidents and unnecessary worry. With modern backup camera systems offering wireless convenience, high-definition displays, and easy setup, there’s no reason not to add this essential tool to your RV.
After setting mine up, I couldn’t imagine traveling without it. Whether reversing into a campsite or backing out of a gas station, I know exactly what’s behind me, and that peace of mind makes every journey feel a little more effortless and secure.