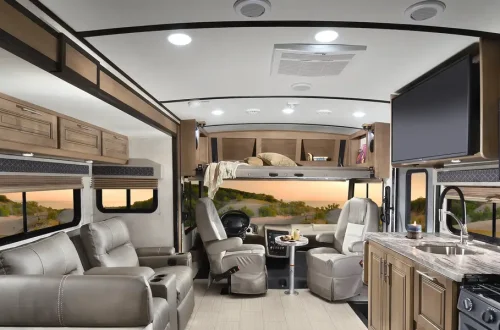
Changing the look of your RV interior can completely transform the mood of your space, and one of the easiest, most cost-effective ways to do it is by installing peel-and-stick wallpaper. Unlike traditional wallpaper, which requires paste and precision, peel-and-stick versions are simple to apply, removable, and ideal for RV walls. It’s a project that can be done in a single afternoon but leaves a lasting impression.
When I decided to refresh my RV’s interior, I wanted something that didn’t involve major renovations or too many tools. Peel-and-stick wallpaper turned out to be the perfect solution, it’s affordable, stylish, and beginner-friendly. Whether you want a cozy cabin vibe, a modern minimalist look, or a splash of color, this method gives your RV a personality upgrade without the mess.
Planning Your RV Wallpaper Project
Before jumping in, take some time to visualize the look you want. RV interiors are compact, so patterns and colors play a big role in how the space feels. Light shades can make your RV look larger and airier, while darker tones create warmth and intimacy. For small walls or accent sections, bold patterns can work beautifully without overwhelming the space.
It’s also important to choose wallpaper that’s high-quality and specifically made for peel-and-stick applications. Some cheaper versions don’t adhere well to RV surfaces, especially those with slight texture. Always check the product description and user reviews to ensure it’s suitable for your wall type.
Once you’ve selected your design, measure every wall you plan to cover. Write down the width and height, and then calculate how many rolls you’ll need. Always order at least one extra roll, wallpapers can have slight color variations between batches, and having a spare ensures consistency if you need to patch or extend coverage later.
Preparing Your RV Walls
Proper surface preparation is key to making your peel-and-stick wallpaper adhere correctly and last. RV walls tend to be coated with a thin vinyl or laminated finish, which can make adhesion tricky if not cleaned properly.
Start by removing any old décor, hooks, or wall plates. Wash the walls with a gentle solution of warm water and mild dish soap to remove grease and dust. After washing, dry the walls completely with a clean microfiber cloth. For surfaces that feel slightly slick, use rubbing alcohol on a soft rag to lightly wipe down the area, this helps the wallpaper grip better.
If your walls have any dents, holes, or uneven spots, patch them up with lightweight spackle and sand them down smoothly once dry. Smooth walls are essential for a seamless finish.
Lastly, remove all switch covers and outlet plates. It might seem like a small step, but it makes a huge difference in creating clean, professional-looking edges.
Gathering Your Tools
You don’t need a lot of equipment to install peel-and-stick wallpaper, but having the right tools will make the job much easier. Here’s a quick list of what you’ll need:
- Measuring tape
- Utility knife or sharp blade
- Level or straight edge
- Squeegee or smoothing tool
- Pencil
- Step stool or ladder
- Clean cloths
Optional items include a hairdryer (to help with corners or repositioning) and an extra pair of hands if you’re dealing with large sheets.
Cutting and Lining Up the Wallpaper
Before applying any wallpaper to the wall, unroll it on a flat surface and measure out each section you’ll need. Cut each piece about two inches longer than your wall height. The extra bit at the top and bottom gives you room to trim neatly after application.
If your wallpaper has a repeating pattern, make sure to match the pattern between sections. Aligning the design correctly before you stick it down will save you from frustration later.
Label each cut piece according to its position (like “left wall” or “above couch”) to stay organized as you work.
Applying the Peel-and-Stick Wallpaper
Start with one section at a time. Peel about six inches of the backing from the top of your wallpaper piece. Carefully align the top edge with your ceiling or trim line, ensuring it’s straight using a level. Stick the exposed portion to the wall and gently press it in place.
Once the top is secured, slowly peel off more of the backing while pressing the wallpaper downward. Use a smoothing tool or squeegee to eliminate air bubbles and ensure the adhesive lays flat. Work from the center outward to avoid trapping air underneath.
If you notice a bubble forming, gently lift the wallpaper back up and smooth it down again. Don’t worry about small mistakes, peel-and-stick wallpaper is very forgiving and can be repositioned several times before losing tackiness.
For each new strip, align the pattern carefully at the seam. Overlap slightly if needed, but avoid gaps or visible edges. Take your time with this part; clean seams make all the difference in the final appearance.
Trimming and Finishing the Edges
Once the wallpaper is in place, trim the excess along the ceiling, floor, and corners using a sharp utility knife. Press the paper firmly into the edge before cutting for a clean line. Replace outlet covers and switch plates once all sections are done.
Corners can be a bit tricky. If your RV has rounded or uneven corners, use a hairdryer to gently warm the wallpaper as you press it into shape. The heat makes the adhesive more flexible and helps it conform to curves without peeling.
Dealing With Difficult Areas
Some parts of your RV, like around windows, doors, or cabinetry, can be challenging to cover. Measure carefully and make small relief cuts where needed to fit around obstacles.
For curved or slanted walls, apply shorter sections instead of long strips. Smaller pieces are easier to manage and align in tight spaces.
In spots near moisture, such as the kitchen backsplash or bathroom, consider using a clear wallpaper sealant or lightweight adhesive spray to reinforce the edges. This prevents water from seeping in and loosening the adhesive over time.
Maintenance and Longevity
Once installed, peel-and-stick wallpaper requires minimal upkeep. It can be cleaned with a soft, damp cloth, avoid abrasive cleaners that might damage the surface.
If a section starts to lift over time, simply press it back into place or use a touch of adhesive spray to secure the edges. The beauty of this type of wallpaper is that it’s removable, so if you decide to redecorate or sell your RV later, you can peel it off without damaging the walls underneath.
Creative Ideas for RV Wallpaper Placement
Peel-and-stick wallpaper isn’t limited to full walls. It’s perfect for accent areas, backsplashes, and even ceilings. I’ve seen great results when used behind the bed, around the kitchen area, or to highlight a small reading nook.
If your RV layout feels cramped, applying wallpaper to one feature wall can create depth and dimension without overwhelming the entire space. Metallic or textured patterns can also reflect light beautifully, making the RV appear brighter and more inviting.
For a unique touch, combine two wallpaper designs, perhaps a subtle neutral on most walls with a bold geometric pattern behind the dinette or above the couch. This adds personality and defines different areas within your RV.
Tips for a Professional Finish
To make your wallpaper look like it was professionally installed, start from the least visible corner of your RV. If you make a small alignment error, it’ll be less noticeable. Always ensure your first strip is perfectly straight; every other piece depends on it.
Work in small sections rather than trying to cover an entire wall at once. Smooth as you go, checking frequently for air pockets or wrinkles. Use good lighting while you work, uneven walls or slight bubbles are easier to spot early.
Avoid applying wallpaper in extreme temperatures or high humidity. Warm weather can make the adhesive too soft, while cold conditions make it hard to stick properly. A stable, moderate indoor temperature ensures the best results.
Why Peel-and-Stick Wallpaper Works So Well in RVs
One of the best things about peel-and-stick wallpaper is how perfectly it suits the RV lifestyle. It’s lightweight, doesn’t require permanent adhesives, and can handle the movement that comes with travel. Unlike paint or heavy paneling, it doesn’t crack or flake during vibration or temperature changes.
It also lets you experiment with your décor. Since RV spaces are compact, even small updates can completely transform the feel of your home on wheels. You can swap designs seasonally or just refresh your look without major costs.
Final Thoughts
Updating your RV with peel-and-stick wallpaper is one of those projects that looks complex but is surprisingly straightforward once you begin. It doesn’t require professional skills, expensive tools, or days of labor, just patience, planning, and a bit of creativity.
After doing it myself, I can say it’s incredibly rewarding to see the transformation unfold. Each section you complete adds warmth and character to your space. It’s an affordable way to make your RV feel more personal, cozy, and reflective of your style.
So if your walls are looking tired or dull, grab a few rolls of peel-and-stick wallpaper and give your RV the makeover it deserves. With a few hours of effort, you’ll have a refreshed interior that feels brand new and entirely your own.