Replacing RV flooring is one of the most dramatic upgrades you can do to refresh your interior and make your space feel brand new. Vinyl plank flooring is an ideal option for this because it’s durable, lightweight, water-resistant, and stylish. It holds up beautifully against the unique conditions of RV life, like temperature fluctuations, constant movement, and limited square footage. When I decided to update my own RV flooring, I was amazed at how much cleaner and more spacious everything felt afterward. Installing vinyl plank flooring in an RV isn’t as complicated as it might sound, if you take your time, plan carefully, and follow each step, the results can be incredible.
Why Vinyl Plank Flooring Is Perfect for RVs
Vinyl plank flooring combines practicality with visual appeal. It’s designed to mimic the look of real wood while being much easier to maintain. In an RV, where moisture, spills, and dirt are a constant part of life, that’s a huge advantage. Vinyl planks are water-resistant, easy to clean, and come in lightweight forms that don’t add much to your rig’s total weight.
Another reason I chose vinyl planks was their flexibility. RV floors often have uneven areas or slight slopes, and vinyl planks can handle those variations much better than rigid materials like tile. They’re also simple to cut and fit around tricky corners or built-in furniture, which is important since RV layouts are rarely straightforward.
Beyond functionality, the aesthetic impact is remarkable. A new floor can completely transform the look of your RV interior, making it feel like a luxury space rather than a cramped camper.
Planning and Preparation
The success of any flooring project starts with good planning. Before I bought anything, I measured the entire RV floor area, including under furniture and cabinets where I planned to replace the flooring. It’s better to purchase a little extra material than to run short mid-project. I usually add about 10 percent to the total measurement for waste and mistakes.
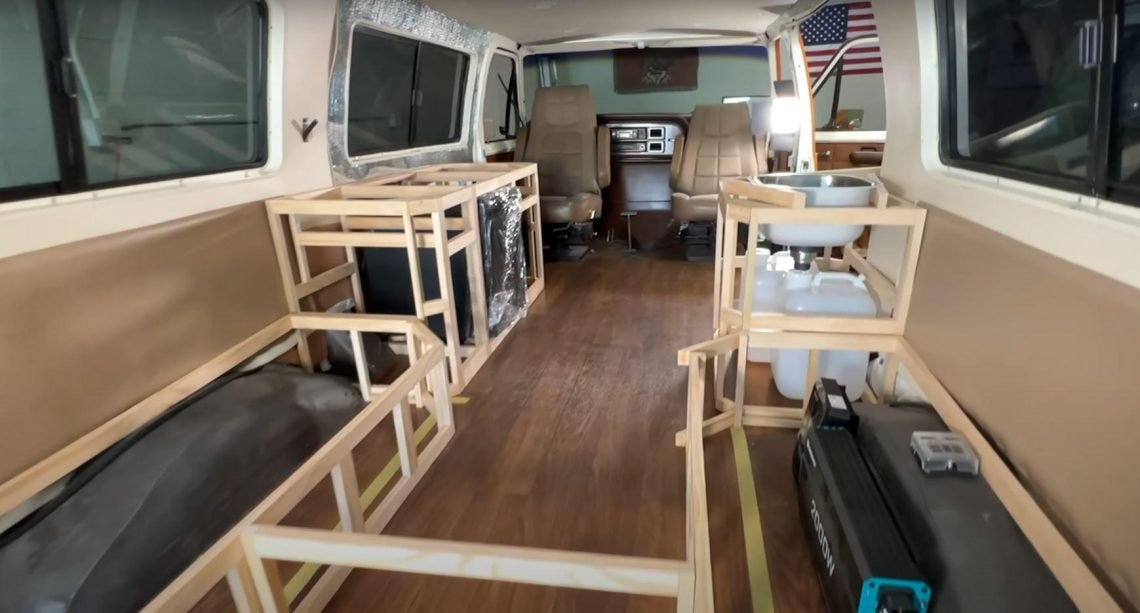
Next, I removed all furniture that could be easily moved. For heavier built-in pieces, like dinettes or the bed frame, I worked around them carefully. I also removed the old flooring, carpet, vinyl sheets, or laminate, along with any staples or nails sticking out from the subfloor.
If your RV has slide-outs, it’s important to take note of how the flooring interacts with them. You may need thinner planks or transition strips to ensure the slides operate smoothly once the flooring is installed.
Once everything was cleared, I cleaned the subfloor thoroughly with a vacuum and a damp mop. Any dirt or debris left behind can cause planks not to sit properly or lock together correctly.
Inspecting and Repairing the Subfloor
After removing the old flooring, I checked the subfloor for soft spots, water damage, or uneven areas. RVs can develop these issues over time due to moisture or shifting during travel. I repaired soft spots with wood filler and replaced any damaged plywood sections to create a solid foundation.
A smooth, level surface is essential. I used a long straightedge to find uneven areas and sanded down any high spots. For low areas, I applied a leveling compound. The flatter the surface, the cleaner and longer-lasting your flooring will be.
Gathering Tools and Materials
You don’t need a professional workshop to install vinyl plank flooring in an RV. Most tools are simple and easy to handle. Here’s what I used for my project:
- Vinyl plank flooring (enough to cover your square footage plus 10%)
- Utility knife or vinyl cutter
- Tape measure and straight edge
- Rubber mallet and tapping block
- Pry bar
- Spacers
- Pencil
- Cleaning supplies (vacuum, mop, rag)
- Transition strips (optional for slide-outs or thresholds)
Having everything ready before you begin makes the installation smoother and helps you stay organized.
Removing Trim and Baseboards
Before laying the new flooring, I carefully removed the baseboards, transition strips, and any quarter-round molding along the walls. This allowed me to fit the vinyl planks underneath for a clean, seamless edge. I used a pry bar and took my time to avoid damaging the trim, as I planned to reuse it once the flooring was done.
Labeling each piece as I removed it helped me remember where everything went when it came time to reinstall.
Deciding on Layout and Direction
One of the most important design choices is deciding which direction to lay the planks. Running the planks lengthwise along the RV usually looks best because it creates a visual flow and makes the space feel longer. However, I recommend doing a dry layout first to see how it looks.
I also checked where the seams would land to make sure I wouldn’t end up with narrow strips along one wall. Adjusting your starting point can prevent that and make the finished floor look more balanced.
Starting the Installation
Once the plan was in place, I began installing from one corner of the main living area. Most vinyl planks have a click-lock system that allows them to snap together easily without glue. I placed spacers between the first row of planks and the wall to leave room for expansion, which is important in an RV that experiences temperature swings.
Using a tapping block and mallet, I gently tapped each plank into place, making sure the seams were tight. Working one row at a time helped me maintain a straight line and ensured that everything locked correctly.
Cutting Around Obstacles
RVs have plenty of corners, vents, and built-in furniture to work around, which requires careful cutting. For straight cuts, I scored the plank with a utility knife and snapped it cleanly. For curved or irregular cuts, such as around a toilet base or cabinet, I used a jigsaw.
It takes patience to get these cuts right, but the cleaner the fit, the more professional the finished floor will look. Measuring twice before cutting saved me from wasting planks unnecessarily.
Staggering the Planks
To make the flooring look natural, I staggered the seams from row to row rather than aligning them in a grid pattern. This also adds strength and prevents the joints from lifting over time. I typically started every new row with a piece that was at least six inches shorter or longer than the previous row’s first plank.
The pattern looked random but cohesive once the entire floor was covered. It’s a small detail that makes a big visual difference.
Dealing with Slide-Outs and Transitions
If your RV has slide-outs, you’ll need to plan how the new flooring will interact with them. In my case, I used thin transition strips at the edges of the slide to prevent friction when extending or retracting. Some people choose to float the planks beneath the slide, but this can cause issues if the planks lift or catch.
I also installed transition pieces between rooms where different flooring types met, such as from vinyl to carpet in the bedroom. These not only make the floor look finished but also protect the edges of the planks from lifting.
Reinstalling Trim and Fixtures
After all the planks were in place, I removed the spacers and reattached the baseboards and trim. This covered the expansion gaps and gave the floor a polished, finished appearance. I used finishing nails to secure the trim, being careful not to drive them through the planks themselves.
For extra detail, I added a bead of caulk where the trim met the wall. This sealed everything nicely and made it look professionally done.
Cleaning and Inspecting the New Floor
Once everything was installed, I gave the floor a thorough cleaning with a damp mop to remove dust and debris. I avoided using harsh chemicals during the first few days to allow the planks to settle properly.
Walking barefoot on the new floor for the first time was incredibly satisfying. The surface felt sturdy yet soft underfoot, and it gave the entire RV a bright, refreshed atmosphere.
Tips for Maintaining Vinyl Plank Flooring
Vinyl plank flooring doesn’t need much maintenance, but a few habits help keep it in top shape. I use a soft-bristle broom or vacuum with a hard floor attachment to remove dirt and grit that could scratch the surface. A damp mop with mild soap keeps it looking new.
Since RVs experience movement during travel, it’s smart to check the floor periodically for gaps or lifted edges. If any planks shift slightly, they can usually be tapped back into place with a mallet.
Using rugs in high-traffic areas like the entryway or kitchen helps protect the surface from wear and adds warmth to the design.
Benefits of Doing It Yourself
Installing vinyl plank flooring yourself saves a lot of money compared to hiring professionals. The process is straightforward, and the sense of accomplishment afterward is hard to beat. It also gives you full control over the design, color, and layout, something that can make your RV feel truly personal.
The lightweight nature of vinyl planks means you won’t be adding unnecessary weight to your RV, which helps maintain fuel efficiency. Plus, if you ever decide to sell your RV, updated flooring can increase its resale value.
Mistakes to Avoid
It’s easy to get excited and rush through installation, but small mistakes can lead to bigger problems later. Failing to leave enough expansion space near walls can cause the planks to buckle when the RV heats up. Skipping underlayment when it’s needed can result in a noisy floor that flexes too much.
I also recommend avoiding installation during extreme temperatures. Vinyl can expand or contract depending on the weather, so doing the job in moderate conditions helps the planks settle naturally.
How the Project Transformed My RV
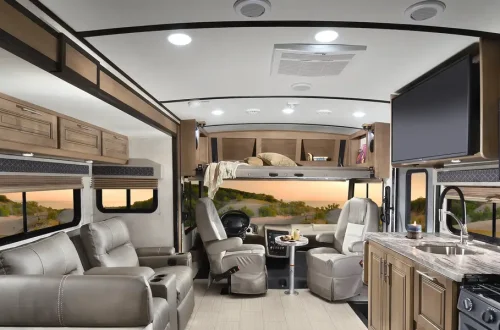
Before installing vinyl plank flooring, my RV felt cramped and outdated, especially with the worn carpet that collected dust and stains. Once the planks were installed, the transformation was dramatic. The wood-look finish brought warmth and sophistication to the space, while the easy-to-clean surface made daily maintenance a breeze.
What surprised me most was how much brighter the interior looked. The reflective surface of the planks bounced natural light around, giving the RV a clean, open feel. It’s one of those upgrades that instantly makes your RV feel newer and more enjoyable to spend time in.
Final Thoughts
Installing vinyl plank flooring in your RV is one of the best DIY projects for upgrading both style and comfort. The process requires patience and attention to detail, but the results are worth every effort. You end up with a surface that’s durable, water-resistant, and visually stunning, all essential qualities for life on the road.
Once I completed my flooring, it felt like I had stepped into a brand-new RV. The modern look, easy maintenance, and durability make vinyl plank flooring an investment that pays off every time I set foot inside. Whether you’re renovating an older rig or customizing a newer one, this upgrade is a perfect blend of practicality and beauty that can completely redefine your RV experience.