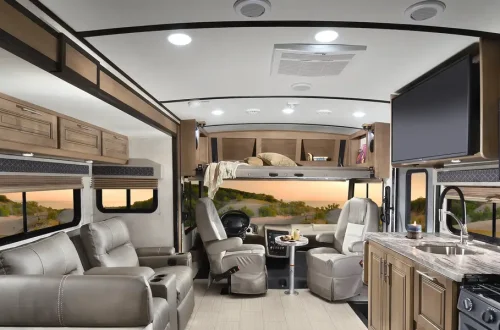
Painting RV walls can completely transform the interior, making it feel modern, bright, and more like home. But unlike painting a regular house, RV walls are often made from laminated panels or wallpapered surfaces that don’t hold paint well unless properly prepped. Without the right steps, paint starts peeling, flaking, or bubbling after just a few weeks on the road.
I’ve gone through this process myself, and after plenty of trial and error, I found methods that make the paint last beautifully through every trip. In this guide, I’ll walk through the exact steps on how to paint your RV walls without peeling, from preparation to finishing touches, so you can give your RV the upgrade it deserves.
Assessing Your RV Walls
Before touching a paintbrush, I start by assessing the surface type. Most RV walls are covered with vinyl wallpaper, laminated panels, or a thin veneer finish. Each reacts differently to paint, so it’s crucial to know what I’m working with.
If the walls are glossy or have a slick vinyl surface, I know that paint won’t stick well without special preparation. For matte or textured walls, adhesion is slightly easier. I also look for water damage, stains, or bubbles that might affect the final result. Peeling or loose wallpaper should be fixed before painting, as painting over it will only lead to more peeling later on.
Cleaning and Degreasing the Walls
Clean walls are the foundation of any lasting paint job. RV walls tend to collect dust, grease, and residue from cooking or everyday use, especially in tight spaces. I wipe down every surface with a degreaser or a mix of warm water and dish soap.
After cleaning, I rinse with plain water and let everything dry completely. I also make sure to remove outlet covers, switch plates, and any wall fixtures before moving on. Skipping this step might seem tempting, but I’ve learned that even a small trace of grease can ruin the paint’s ability to adhere properly.
Repairing and Sanding the Surface
Once the walls are clean, I repair any imperfections like small holes or cracks. For this, I use lightweight spackling paste and a putty knife. Once the filler dries, I sand it smooth using fine-grit sandpaper.
Next comes one of the most critical steps: sanding the entire wall surface. I use a sanding block or orbital sander with 220-grit sandpaper to lightly scuff the surface. This removes any shine from vinyl or laminate and gives the primer something to grip.
After sanding, I vacuum up dust and wipe the walls with a tack cloth or damp microfiber towel to ensure a clean surface. Skipping the sanding step almost guarantees that the paint will peel later, especially in humid conditions.
Masking and Protecting Other Areas
Before painting, I cover areas I don’t want to paint with painter’s tape and plastic sheeting. This includes window trims, floor edges, and cabinets. I’ve learned to spend extra time here because once the paint starts flying, even a small unprotected area can lead to messy cleanup later.
If I’m painting near fabric or carpeted sections, I tape down old sheets or drop cloths for extra protection. The goal is to make sure that only the walls get paint , nothing else.
Applying a High-Quality Primer
Primer is the secret weapon to prevent peeling. I never skip this step, no matter how small the project. RV walls need a strong bonding primer designed to adhere to slick or glossy surfaces. My favorite type is a water-based bonding primer, which sticks to vinyl, laminate, and other tricky materials without sanding between coats.
Using a roller for flat areas and a brush for corners, I apply an even coat of primer, making sure it fully covers every inch. I allow it to dry according to the manufacturer’s directions , usually between 8 to 24 hours , before applying paint.
If the wall still feels slick after drying, I lightly sand it again and apply a second thin coat. This ensures maximum adhesion and gives the paint something solid to hold onto.
Selecting the Right Paint
Not all paints work well inside an RV. I prefer using high-quality acrylic latex paint because it’s flexible, easy to clean, and resists peeling even in fluctuating temperatures. The paint should also have a low-VOC or zero-VOC formula since RV interiors are smaller spaces with limited ventilation.
For the finish, I usually go with satin or eggshell. These finishes are easier to clean than flat paint but don’t highlight wall imperfections like semi-gloss might.
Color-wise, lighter tones can make the RV feel more open and airy, while accent walls can add personality. I like to test small patches before committing to a color because lighting inside RVs can change how the paint looks throughout the day.
Painting the Walls
With everything prepped and primed, it’s time for paint. I use a high-quality foam roller to apply thin, even coats. It’s tempting to go heavy with the first layer, but thin coats adhere better and dry more evenly.
I work systematically, starting from one corner and moving across the wall in smooth strokes. After the first coat dries, I lightly sand again to remove any small bumps or roller marks. Then I apply the second coat for full coverage.
Depending on the color and type of paint, I sometimes add a third coat, especially for darker or highly glossy surfaces. I let the paint cure for at least 48 hours before reinstalling any fixtures or touching the walls.
Painting Around Fixtures and Trim
RV interiors often have tight corners and built-in fixtures. I use an angled brush to carefully paint around windows, doors, and cabinetry. For detailed trim work, I take my time to avoid drips or uneven edges.
Sometimes I remove small pieces of trim entirely and paint them separately. This makes the process easier and ensures the walls look clean and professional once everything is reassembled.
Sealing and Protecting the Paint
To make sure the new paint job lasts, I apply a clear, matte polyurethane topcoat over high-traffic areas. This adds durability and makes cleaning much easier. I avoid glossy finishes because they can make walls look too shiny and reflect light awkwardly inside an RV.
Once sealed, the walls are more resistant to scratches, moisture, and the wear and tear that comes with travel.
Ventilation and Curing Time
Proper ventilation during and after painting makes a big difference. I open windows, roof vents, and doors to allow airflow, especially when using primer or sealant. Even low-VOC paints can produce mild fumes, so air circulation is essential.
After finishing the last coat, I let the paint cure fully for several days. This curing time hardens the paint and improves adhesion, reducing the risk of peeling down the line.
Fixing Common Painting Mistakes
Even with careful prep, small mistakes can happen. If I notice bubbles forming under the paint, it usually means moisture got trapped. In that case, I sand the area lightly once it’s dry and repaint it after ensuring proper ventilation.
For peeling spots, I scrape away the loose paint, reapply primer, and paint again. Touch-ups are much easier if I keep leftover paint sealed and labeled for future use.
If streaks or uneven patches appear, it’s usually due to rushing the drying process or using low-quality tools. Investing in good brushes and rollers always pays off with smoother results.
Decorative Options for a Personal Touch
Once the paint is dry, I like to personalize the space a bit. Adding peel-and-stick wall decals or stencils gives the RV a unique flair without damaging the paint. For a subtle touch, I sometimes use painter’s tape to create accent stripes or geometric designs with contrasting colors.
These decorative elements not only enhance the look but also make the interior feel more like a custom home on wheels.
Long-Term Maintenance Tips
Keeping the painted walls in good condition doesn’t require much effort, but a few habits go a long way. I clean the walls with a soft cloth and mild soap instead of harsh chemicals that could strip the finish.
During humid or rainy seasons, I use a dehumidifier to prevent moisture buildup inside the RV. Regular ventilation also helps maintain the paint’s integrity and prevents peeling due to condensation.
If I notice small scuffs or marks, I do quick touch-ups with leftover paint to keep everything looking fresh.
Why Proper Preparation Matters Most
After multiple paint projects in my RV, I’ve realized that preparation makes or breaks the result. It’s not about how fancy the paint is but how well the surface was cleaned, sanded, and primed. Most peeling happens because paint was applied too quickly or directly onto glossy wallpaper without bonding primer.
By taking the time to prep thoroughly, the walls not only look beautiful but also withstand years of travel, temperature shifts, and daily use.
Refreshing Cabinets and Trim Alongside Walls
When I paint my RV walls, I often tackle the cabinets and trim at the same time. A cohesive color palette brings the whole interior together. I use the same primer and paint process for cabinetry, ensuring adhesion on slick laminate surfaces.
Adding new cabinet hardware or sealing edges with caulk gives the entire space a professional finish. It’s a cost-effective way to give the RV a complete interior makeover without replacing anything major.
Estimating Time and Cost
Painting an RV interior typically takes two to three days, depending on drying times and surface area. Materials like primer, paint, brushes, tape, and drop cloths usually cost between $100 and $200, far less than hiring professionals or replacing wall panels.
The time investment is worth it when you see how fresh and modern the RV looks afterward. Plus, doing it myself allows me to choose the exact colors and finishes I want without compromise.
Final Inspection and Clean-Up
Once everything dries, I remove all painter’s tape carefully and reinstall outlet covers and fixtures. I check for missed spots and fix any uneven lines. I also take a soft cloth to wipe away dust or residue left from sanding or taping.
Finally, I step back and admire the transformation. What was once dull and outdated now feels bright, inviting, and completely personal.
Conclusion
Painting your RV walls without peeling is all about careful preparation and patience. Cleaning, sanding, priming, and selecting quality materials are the key steps that ensure the paint adheres properly and lasts for years.
Every step of the process, from prepping the walls to adding the final coat, contributes to a durable, smooth finish that can handle life on the road. The satisfaction of transforming the space with your own hands is unmatched, and knowing that the paint won’t peel no matter how far you travel makes it even better.
With the right tools and a bit of effort, any RV owner can achieve a professional-quality paint job that stands the test of time and adventure.