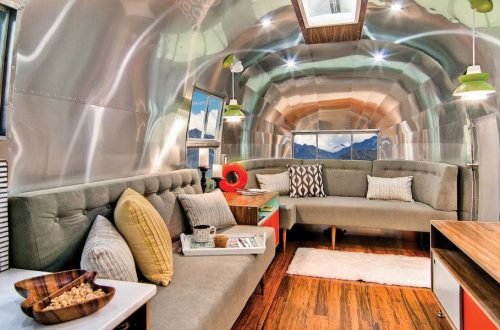
When I decided to replace my RV flooring, I realized just how much the right surface could transform the entire feel of a space. It’s one of those upgrades that not only improves the look of your RV but also boosts comfort and functionality. The best part is that with the right tools, some patience, and a little know-how, replacing your RV flooring can be done efficiently and affordably. Here’s how I managed to pull it off and how you can do it too, step by step.
Assessing Your Current RV Flooring
Before diving into the renovation, I took a close look at the condition of the existing floor. I checked for soft spots, water damage, and loose sections, especially near the bathroom and kitchen, since those areas are more prone to leaks. Identifying problem areas early helps you plan better and avoid surprises once you start removing the old flooring.
I also considered what type of flooring would suit my RV lifestyle. If you travel often or have pets, durability and easy maintenance become essential. Vinyl plank flooring stood out for me because it’s lightweight, waterproof, and has a stylish wood-like appearance. Other popular choices include laminate, carpet tiles, and vinyl sheet flooring, but the final decision should match your needs and budget.
Gathering Tools and Materials
Replacing RV flooring doesn’t require expensive equipment, but having the right tools makes the process smoother. I gathered a utility knife, pry bar, tape measure, hammer, adhesive remover, and a flooring roller. I also made sure I had enough replacement flooring plus an additional 10% to cover mistakes or irregular cuts.
Depending on the type of flooring you choose, you might need extra materials like underlayment, glue, or transition strips. I learned that having everything ready beforehand saves you from unnecessary store runs in the middle of your project.
Removing the Old Flooring
Removing the old flooring was the most time-consuming part for me, but it’s an essential step to ensure a smooth finish later. I started by removing any furniture, trim, and vents to expose as much of the floor as possible. If your RV has carpet, be prepared for a workout. I used a utility knife to cut the carpet into manageable sections, then peeled it up slowly.
Vinyl or laminate flooring usually comes up easier, but you may need a heat gun or scraper to remove adhesive residue. Once everything was stripped down, I vacuumed thoroughly to remove dirt, staples, and debris. You want a clean and level surface before installing anything new.
Repairing and Preparing the Subfloor
After the old flooring was gone, I took time to inspect the subfloor. If you notice soft or discolored areas, that’s usually a sign of water damage. I replaced those sections with new plywood panels, ensuring they were securely fastened.
For uneven sections, I used a floor-leveling compound to smooth out dips or bumps. A flat and solid base is critical for proper installation and to prevent squeaks or gaps later on. Once I was satisfied with the surface, I cleaned it again to remove any dust or residue.
Measuring and Cutting the New Flooring
Precision is key when cutting and fitting the new flooring. I measured the RV carefully, noting any corners, slide-outs, or irregular shapes. I always recommend measuring twice before cutting anything. Vinyl planks were easy to trim with a utility knife, while laminate required a saw for clean edges.
One trick that helped me was starting from the main entryway and working toward the back of the RV. That way, any small misalignments or imperfect cuts ended up in less noticeable areas like under furniture or inside closets.
Installing the Flooring
Installation depends on the type of flooring you choose, but the overall process remains similar. For vinyl planks, I used the click-lock system, snapping each piece together tightly. If you’re using peel-and-stick tiles, make sure the subfloor is completely dry and dust-free for the adhesive to stick properly.
I took my time to align the planks, making sure each row was straight before moving to the next. If you’re working with slide-outs, leave a little expansion gap along the edges to allow movement without causing buckling. I also rolled over the surface with a flooring roller to ensure everything adhered firmly.
Adding Trim and Finishing Touches
Once the new flooring was down, it was time for the details that make everything look polished. I reinstalled the trim, vent covers, and transition strips between different flooring types. Adding quarter-round molding around the edges gave it a professional, seamless look.
To further enhance the space, I added small rugs near high-traffic areas to protect the new floor. Rugs also make the space feel cozier while keeping dirt from spreading.
Handling Slide-Out Sections
Slide-outs can be tricky when it comes to flooring because they move in and out frequently. I found that flexible flooring materials like vinyl or carpet tiles work best in these areas. For fixed slide-outs, I trimmed the flooring to fit tightly without restricting movement. Always test the slide-out operation after installation to ensure nothing catches or bunches up.
If your RV has mechanical slide-outs, avoid thick flooring materials that can interfere with the sliding mechanism. A thin but durable vinyl plank is usually the safest choice.
Waterproofing and Maintenance
Since RVs are prone to moisture buildup, adding a moisture barrier beneath the flooring can extend its life. I used a thin underlayment that not only provided insulation but also prevented condensation from damaging the subfloor.
Maintenance is simple if you choose the right materials. I sweep and vacuum regularly and occasionally wipe the floor with a damp mop. Avoid excessive water during cleaning because even waterproof floors can suffer if moisture seeps through the seams.
Creative Flooring Design Ideas
Replacing your flooring doesn’t mean you have to stick to plain designs. I used two different vinyl plank colors to create a border pattern that added visual depth to the small space. You could also consider using peel-and-stick tiles in geometric or rustic patterns for a unique touch.
For those who want a more homelike feel, adding soft carpet tiles in the bedroom area brings warmth underfoot while keeping the main living area sleek and easy to clean. Mixing textures can make your RV feel larger and more inviting.
Budget Breakdown and Savings
My entire flooring replacement project cost just under $450, including materials and supplies. Vinyl planks were the biggest expense, but I saved significantly by doing all the work myself. If you’re on a tight budget, check local hardware stores or online marketplaces for clearance flooring.
Don’t forget to factor in small expenses like trim nails, glue, and underlayment. These add up but still keep the total well below what you’d pay a professional installer. The satisfaction of seeing the finished result makes the effort worth every penny.
Common Mistakes to Avoid
One mistake I made early on was not accounting for extra material. Always buy a little more flooring than you think you’ll need to cover mistakes or pattern matching. Another common issue is neglecting expansion gaps. Without these, your flooring can buckle or lift in warm weather.
Also, avoid rushing the removal process. Leaving behind staples or uneven patches will cause problems later. Taking time to prep correctly ensures your new floor looks flawless and lasts for years.
Benefits of Replacing RV Flooring
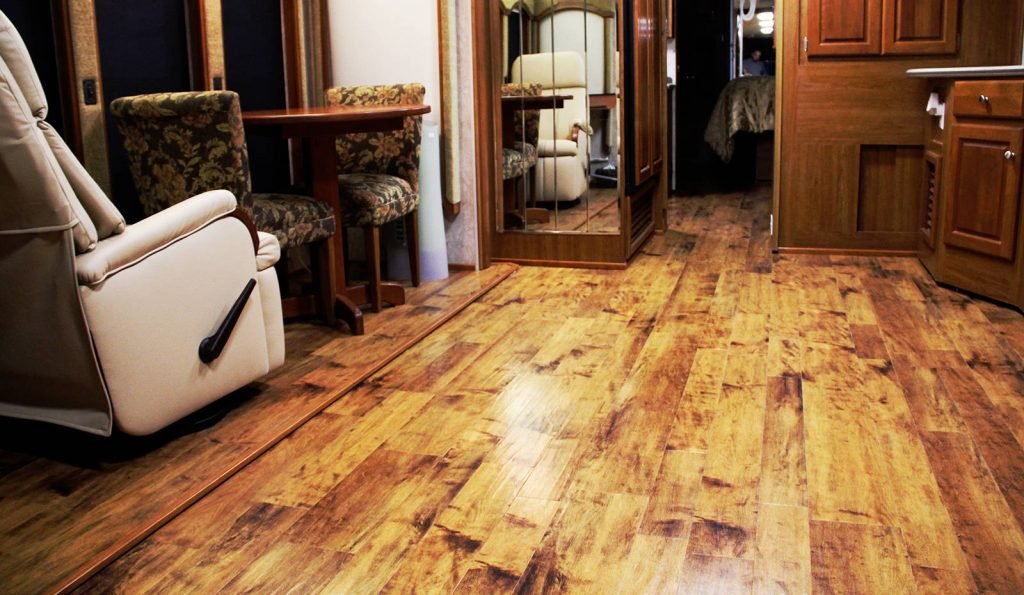
Once the project was complete, I couldn’t believe how much brighter and cleaner the RV felt. The new flooring not only improved aesthetics but also made maintenance easier. It feels more modern, more durable, and more comfortable to walk on.
The upgrade also increased the overall value of my RV. If I ever decide to sell, I know buyers will notice the care that went into keeping the space updated and functional. It’s one of those investments that pays off both visually and financially.
My Final Thoughts
Replacing RV flooring might seem like a big job, but it’s absolutely doable for anyone willing to invest some time and effort. With the right preparation, tools, and patience, you can transform your RV interior into a space that feels brand new.
Doing it yourself allows you to customize every detail, from the materials to the design. Every cut, every plank, and every finishing touch reflects your personal style. The best part is standing back at the end and realizing you’ve created something lasting with your own hands.
Whether you’re upgrading for comfort, appearance, or resale value, new flooring breathes fresh life into your RV. Once I stepped onto that new surface, I knew I’d done something truly rewarding, turning my rolling home into a reflection of the adventure-loving person behind the wheel.