Seals may not seem like the most exciting part of an RV, but they’re among the most important. They protect against water leaks, dust, insects, and drafts, all of which can easily find their way inside if the seals start to deteriorate. I’ve learned over time that even the smallest crack in a seal can lead to costly water damage or mold issues if ignored. Replacing worn-out RV seals is a simple but essential maintenance task that every RV owner should master. With the right approach and tools, it’s not complicated, and it makes a world of difference in keeping your RV comfortable and protected from the elements.
Knowing When to Replace RV Seals
Before getting into the replacement process, it’s crucial to know when seals are worn out. I make it a habit to inspect all seals around doors, windows, slide-outs, and storage compartments every few months. Signs that seals need replacing include cracks, flattening, stickiness, or visible gaps where light or air can pass through.
Sometimes the signs are subtle, like noticing a draft near a window, water pooling around the door frame after rain, or hearing more outside noise than usual. In other cases, they’re obvious, such as peeling rubber or seals that have started pulling away from their frames. When I spot these issues, I don’t wait. Seals degrade quickly once they start failing, and replacing them early saves a lot of trouble later.
Gathering the Right Materials
Replacing seals is a straightforward job if you have the right materials. I always gather everything before starting to avoid running back and forth during the project. Here’s what I typically keep on hand:
- Replacement seals (specific to the type and size of my RV’s windows, doors, or slide-outs)
- Utility knife or scissors
- Plastic scraper or putty knife
- Mineral spirits or adhesive remover
- Clean cloths or paper towels
- Silicone or rubber adhesive (if required by the seal type)
- Isopropyl alcohol for cleaning surfaces
- Measuring tape
- Ladder (for roof or high window seals)
Different RV manufacturers use different seal types, such as D-seals, bulb seals, or wiper seals. I always check the owner’s manual or bring a sample of the old seal to match it accurately at the RV parts store. Getting the correct size and shape is key to ensuring a snug fit and effective seal.
Removing Old Seals
The first step in replacing worn-out RV seals is to remove the old material carefully. I start by gently peeling off the old seal, taking care not to damage the surface beneath it. In some cases, the adhesive might be stubborn, so I use a plastic scraper to loosen it. I avoid metal tools because they can scratch or dent the surface.
Once the old seal is removed, I clean the area thoroughly. I apply adhesive remover or mineral spirits to a cloth and wipe away any leftover residue. Afterward, I use isopropyl alcohol to remove oils or dirt, ensuring the surface is completely clean and dry before installing the new seal.
If old adhesive is left behind, it can prevent the new seal from adhering properly or cause uneven gaps. Taking extra time at this stage pays off because a clean surface ensures a tight, long-lasting bond.
Measuring and Cutting the New Seal
Before applying the new seal, I measure the length of the surface area using a measuring tape. I always add a few extra inches to ensure complete coverage, then trim the excess after installation. Cutting seals at the wrong length is a common mistake that can lead to leaks, so I double-check my measurements before making any cuts.
For corners, I either use pre-molded corner seals or carefully cut the ends at a 45-degree angle so they join neatly without gaps. Sharp scissors or a utility knife make clean cuts, which helps the seal fit tightly when applied.
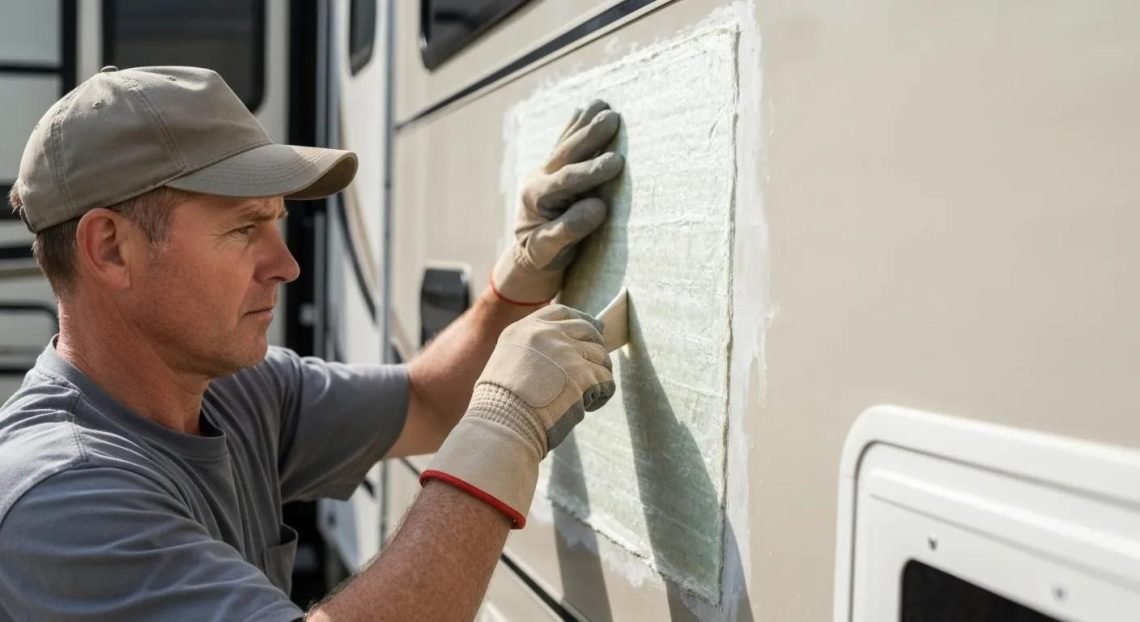
Applying the New Seal
When it comes time to apply the new seal, I start at one end and work slowly along the surface. If the seal has an adhesive backing, I peel off the protective strip a few inches at a time while pressing it firmly into place. Applying too much at once can cause it to stick unevenly or misalign, so patience is key.
If the seal requires separate adhesive, I apply a thin, even layer along the surface before pressing the seal into position. I follow the manufacturer’s instructions carefully regarding drying or curing time. Too much adhesive can cause messy edges, while too little can lead to weak adhesion.
I make sure to press the seal firmly all the way along its length, ensuring no air pockets or gaps form. Once the seal is in place, I go over it with a clean cloth to apply even pressure, helping the adhesive bond securely.
Replacing Door and Window Seals
Doors and windows are the most common places where seals wear out. For door seals, I pay special attention to the hinge side and bottom, since these areas experience the most movement and pressure. I remove the old seal, clean the channel, and apply the new one from the bottom up, ensuring the ends meet without overlapping.
Window seals can be a little trickier because of the shapes and corners involved. I carefully remove any interior trim pieces if needed, then fit the new seal tightly around the frame. For sliding windows, I ensure the seal doesn’t interfere with the sliding track. Once installed, I close the window to check that it shuts tightly without resistance.
Maintaining Slide-Out Seals
Slide-outs are particularly vulnerable to leaks, as they have multiple moving parts and exposure to weather. I inspect the seals on both the sides and top of the slide-out every few months. These seals often take more wear and tear than others due to constant friction when extending or retracting the slide.
When replacing slide-out seals, I fully extend the slide to access all areas. I clean the surfaces thoroughly and install the new seals carefully, ensuring the wiper seals face the correct direction to push water away. I also lubricate the seals lightly with a silicone-based spray to prevent sticking and extend their lifespan.
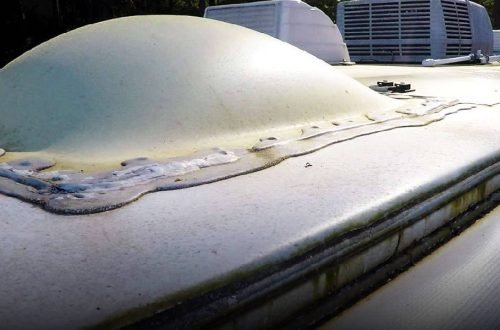
Checking Roof Seals and Edges
Roof seals are critical because water intrusion from above can cause serious structural damage. Every few months, I climb up and inspect the seals around vents, skylights, antennas, and air conditioning units. If I find any cracks or peeling, I remove the old sealant using a plastic scraper, clean the area, and apply a new layer of RV-specific sealant.
For edge seals where the roof meets the sidewalls, I check for lifting or discoloration. I replace these seals immediately if they show signs of wear. Roof maintenance might seem tedious, but a few minutes of inspection can prevent thousands in repair costs later.
Testing the New Seals
Once all the seals are installed, I test them to make sure they’re doing their job. I use a simple method, running a flashlight along one side of the door or window at night while someone stands on the other side to check for light leaks. I also close up the RV and use a water hose to simulate rainfall, watching for any signs of leaks inside.
Testing before heading back on the road gives me confidence that my work is effective. If I find any weak spots, I press down or reapply adhesive to reinforce the seal before it becomes a bigger issue.
Preventing Future Seal Damage
Once new seals are in place, proper care helps them last longer. I clean the seals monthly with mild soap and water to remove dirt, road grime, and debris. After cleaning, I apply a rubber conditioner or protectant to keep them soft and flexible. Harsh sunlight and extreme temperatures can cause seals to crack or dry out, so conditioning them regularly helps maintain elasticity.
When parking for long periods, I use RV covers or park in shaded areas to reduce UV exposure. I also avoid using petroleum-based cleaners, which can deteriorate rubber seals. Simple maintenance habits like these can extend the life of new seals by several years.
Addressing Special Seal Types
Different parts of an RV may use specific seal designs that need unique attention:
- Compression seals: These are found on doors and hatches. They require even pressure when closing, so I make sure the door aligns properly after replacing the seal.
- Foam seals: Common in older RVs, these are easy to replace but need careful cleaning of old foam residue.
- Butyl tape seals: Often used for windows, vents, or trim, these require slow, even pressure during installation to prevent air gaps.
- EPDM or silicone seals: These are more durable and resistant to UV light, but they need compatible adhesives for proper bonding.
Knowing what type of seal I’m working with helps me apply the correct technique and adhesive to get the best results.
Common Mistakes to Avoid
Replacing RV seals isn’t complicated, but a few mistakes can lead to poor results. One of the biggest is not cleaning the surface properly before installation. Even a thin layer of dirt or old adhesive can prevent the new seal from bonding. Another mistake is stretching the seal as it’s applied, which may cause it to shrink later and create gaps.
I’ve also learned not to rush the adhesive curing process. Depending on the temperature and humidity, it may take several hours or even a day to set completely. Using the RV or exposing it to rain before the adhesive cures can ruin the seal. Patience is essential to ensure a long-lasting result.
Why Replacing Seals Matters
The effort spent replacing worn-out seals pays off in multiple ways. New seals prevent water damage, improve insulation, and make heating and cooling systems work more efficiently. They also reduce outside noise, block dust, and keep insects from entering the RV.
On longer trips, I notice a clear difference in comfort after replacing seals. The interior temperature stays consistent, and I don’t feel drafts around doors or windows. Properly sealed compartments also protect stored items from moisture and rust.
Keeping a Maintenance Schedule
To stay on top of seal maintenance, I’ve added it to my RV’s routine inspection checklist. Every season, I take a few hours to walk around the RV, checking each door, window, and vent. I look for cracks, discoloration, or loose edges. Regular inspections make it easier to spot minor issues before they become serious.
I also keep a small stock of replacement seals and adhesive in my maintenance kit. That way, I can handle quick fixes on the road without waiting until the damage worsens. Staying proactive ensures that my RV remains in top condition no matter how many miles I travel.
Final Thoughts
Replacing worn-out RV seals might seem like a small task, but it’s one of the most effective ways to preserve your RV’s longevity and comfort. Seals protect the structure from water, air, and dust, and when they fail, the consequences can be costly. Over time, I’ve found that staying proactive, regular inspections, cleaning, and timely replacement, saves me from bigger headaches down the road.
By following a clear process, removing old seals carefully, cleaning surfaces thoroughly, measuring precisely, and installing with patience, I’ve managed to extend the life of my RV and maintain a comfortable, leak-free environment year-round. It’s one of those simple maintenance habits that pays off every time I hit the road, knowing my RV is sealed tight and ready for any adventure ahead.