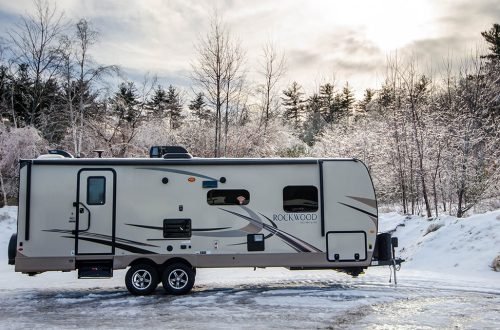
Owning an RV comes with the constant task of maintenance, and one of the most overlooked yet critical areas is sealing the windows and doors. Proper sealing not only keeps out rain, dust, and drafts but also helps regulate temperature, prevents mold growth, and improves your RV’s overall efficiency. Over the years, I’ve learned that sealing windows and doors isn’t just about squeezing caulk into cracks, it’s about understanding how your RV’s structure interacts with weather, travel, and time. The right approach can save you from costly repairs down the road.
Why Proper Sealing Matters
Every RV, regardless of age or brand, is exposed to constant stress. Driving over rough roads causes vibrations that slowly loosen seals. Add in exposure to sun, rain, snow, and fluctuating temperatures, and it’s easy to see why seals degrade over time. When the seals around your windows and doors fail, you’ll start to notice drafts, leaks, or condensation buildup.
Water is your RV’s worst enemy. Once moisture sneaks past a damaged seal, it can seep into walls, flooring, and insulation. Over time, this leads to rot, mildew, and structural damage. I’ve seen small leaks turn into major repairs simply because the seals were ignored for too long. Proper sealing keeps the elements out and extends the life of your RV’s exterior and interior.
Identifying Problem Areas
Before grabbing sealant or tools, it’s essential to know where to look. I usually start with a visual inspection of all window and door frames. I look for cracks, gaps, peeling sealant, or areas where the rubber weatherstripping appears dry or brittle. Touching the seals can tell a lot too, soft, sticky, or crumbling materials mean it’s time for replacement.
Another helpful step is to spray water gently around the frames using a hose while someone else checks the interior for leaks. This test can reveal hidden problem spots that aren’t visible at first glance. I also make it a habit to check the seals after washing the RV or following a heavy rainstorm, since moisture exposure tends to highlight weak points.
Choosing the Right Sealant
The type of sealant you use matters just as much as how you apply it. I’ve learned that not all sealants work for every surface or material. For example, silicone sealants are great for glass and smooth surfaces but don’t adhere well to rubber or certain plastics. Polyurethane and hybrid sealants offer better flexibility and adhesion for RV applications.
For window frames and exterior joints, I prefer a non-sag RV sealant designed specifically for vehicles that flex and move. Self-leveling sealant works best for flat horizontal surfaces like the roof, while non-sag sealant is better for vertical applications.
Butyl tape is another essential material in my toolbox. It’s a flexible, sticky strip that provides a waterproof barrier when installed between the window frame and RV wall. Unlike liquid sealants, butyl tape maintains its flexibility and prevents leaks even when the RV body shifts over time.
Gathering Tools and Preparing the Area
Preparation makes all the difference between a short-term fix and a long-lasting seal. Before applying any new material, I gather the following tools: a plastic scraper, putty knife, cleaning solution, rags, and masking tape. I also keep a caulking gun, sealant tubes, and gloves on hand.
The area must be completely clean and dry. Old sealant can prevent new material from bonding properly, so I carefully remove any remnants using a plastic scraper to avoid scratching the surface. For stubborn residue, a little isopropyl alcohol or adhesive remover works wonders.
I always make sure to clean the area thoroughly with mild soap and water, then allow it to dry completely. Any dirt, grease, or moisture trapped under new sealant will compromise the seal’s effectiveness.
Applying Butyl Tape for Window Seals
When resealing RV windows, I often rely on butyl tape for its flexibility and durability. The process starts with removing the window if necessary. Once it’s out, I clean both the RV wall opening and the window frame thoroughly.
Next, I apply a continuous strip of butyl tape along the entire edge of the window flange. I make sure the tape slightly overlaps at the corners to prevent gaps. Then, I carefully press the window back into place, tightening the screws evenly but not over-tightening, as that can squeeze out too much tape.
As the butyl tape compresses, some excess will ooze out around the edges. I let it sit for a day or two before trimming off the excess for a clean finish. This waiting period allows the tape to fully settle and ensures a watertight seal.
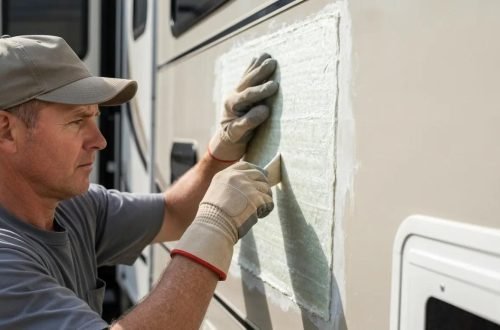
Applying Sealant for Doors and Window Frames
For areas where butyl tape isn’t ideal, such as exterior seams or doorframes, I turn to liquid sealants. I start by applying masking tape around the edges to create clean lines and protect surrounding surfaces. Using a caulking gun, I apply a smooth, even bead of sealant along the seam.
The trick is to apply steady pressure and move at a consistent pace. Once the bead is in place, I smooth it gently with a gloved finger or a caulking tool, ensuring the sealant fills all gaps evenly. After smoothing, I remove the masking tape immediately before the sealant dries to prevent peeling.
It’s also important to check temperature and humidity before applying sealant. Most sealants adhere best when temperatures are between 50 and 80 degrees Fahrenheit, and humidity is low. Extreme conditions can affect drying time and adhesion.
Replacing Weatherstripping Around Doors
Weatherstripping around RV doors serves as the first defense against drafts and moisture. Over time, it compresses or cracks, allowing air and water to slip through. Replacing it is straightforward and can make a noticeable difference in comfort.
I start by removing the old weatherstripping carefully, cleaning off any adhesive residue. Then, I measure and cut new weatherstripping to fit. I prefer using EPDM rubber seals, which are durable and flexible. When installing, I press it firmly into the channel, ensuring it sits evenly without stretching.
After replacing the seal, I test the door by closing it and checking for tight contact. A properly sealed door should close smoothly but firmly, with no visible gaps.
Inspecting After Sealing
Once the sealant or tape is fully cured, I always test my work. I spray water over the newly sealed areas and check the interior for any signs of leakage. This step gives me confidence that the job was successful.
If small gaps or imperfections appear, I touch them up immediately. Leaving even a tiny opening can lead to leaks during the next rainstorm. I also take note of the date and type of sealant used so I can monitor its condition over time.
Seasonal Maintenance and Inspection
Sealing isn’t a one-time job. I make it a part of my seasonal maintenance routine to inspect all seals and weatherstripping. The changing temperatures and constant motion of RV travel cause materials to expand and contract, gradually wearing them down.
In the spring, before camping season begins, I check for cracks or dryness caused by winter storage. In the fall, I inspect again before parking the RV for the colder months. Regular inspection saves time and prevents costly water damage later.
I also keep a small maintenance log to track when seals were last replaced or inspected. This helps me identify patterns and anticipate when areas might need attention again.
Cleaning and Caring for Seals
Keeping seals clean helps them last longer. Dirt, grime, and UV exposure can break down rubber and sealant materials over time. I use a gentle cleaner or mild soap and water to wipe down window and door seals during routine washes.
Applying a UV protectant specifically designed for rubber seals once every few months helps prevent cracking and drying. I avoid petroleum-based products because they can deteriorate rubber quickly.
For butyl and silicone seals, I inspect them visually for discoloration or brittleness. If I notice any peeling or gaps forming, I make quick repairs before the damage spreads.
Troubleshooting Common Sealing Problems
Even with care, a few sealing issues can still arise. One common problem is bubbling or cracking sealant, usually caused by applying it to a damp or dirty surface. If that happens, I remove the affected section and reapply after proper cleaning.
Another issue is shrinkage over time, which creates small gaps. In that case, I top off the old seal with a compatible new layer. Compatibility is key, mixing different types of sealant can cause peeling or reduced adhesion.
In some cases, you might find leaks even after sealing. That often means water is entering from a nearby source, like a roof vent or siding seam. Tracing the leak path with a flashlight and water test usually helps pinpoint the problem.
Enhancing Energy Efficiency
Properly sealed windows and doors not only prevent leaks but also improve insulation. I’ve noticed a significant difference in interior temperature stability after resealing my RV. In hot weather, cool air from the AC stays inside longer, while in winter, warmth doesn’t escape as quickly.
This efficiency translates to lower energy use and reduced strain on heating or cooling systems. It also eliminates drafts, making the interior feel cozier and quieter, especially during windy nights.
Final Thoughts
Sealing RV windows and doors properly is one of the most rewarding maintenance tasks any RV owner can take on. It’s not complicated, but it does require patience, attention to detail, and the right materials. By inspecting regularly, cleaning surfaces thoroughly, and applying sealants carefully, you can keep your RV watertight and comfortable year-round.
I’ve found that treating seals as part of ongoing maintenance rather than an occasional chore pays off in the long run. It’s satisfying to know that every time it rains, your RV stays dry, your interior stays fresh, and your adventures remain uninterrupted. A well-sealed RV is not just protected, it’s prepared for the road ahead.