RV slide-outs are one of the greatest features of modern campers. They transform a compact space into a roomy, comfortable living area with just the press of a button. That extra space makes a big difference on long trips or extended stays. However, the more you use your slide-outs, the more attention they require. Proper maintenance ensures smooth operation, prevents costly breakdowns, and extends their lifespan. Through consistent care, I’ve managed to keep my slide-outs operating flawlessly for years, even after countless trips across varying climates.
Inspecting Slide-Out Seals Regularly
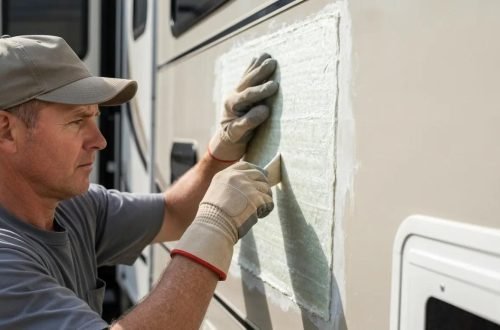
Slide-out seals are your RV’s first line of defense against dust, debris, and moisture. Without properly maintained seals, water can seep into the walls or flooring, leading to mold, rot, or costly interior damage. I make it a habit to inspect both the inner and outer seals every few months, especially before and after a trip.
I run my fingers along the seals to check for cracks, dryness, or gaps. If a seal feels stiff or sticky, it’s a sign that it needs conditioning. I use a rubber seal conditioner designed for RVs, which keeps the seals pliable and prevents them from drying out under sun exposure. Applying the conditioner every few months ensures the seals remain flexible and effective at blocking out the elements.
If I notice a seal starting to pull away or deteriorate, I repair or replace it immediately. Neglecting damaged seals can lead to hidden water leaks that cause serious structural problems over time.
Cleaning the Slide-Out Mechanism
Dirt, sand, and debris can accumulate in the slide-out tracks and gears. Over time, this buildup creates resistance that strains the motor and mechanical components. I like to clean the slide-out mechanism after every few trips, especially when I’ve been camping in dusty or muddy areas.
I start by fully extending the slide-outs and using a soft brush to remove debris from the tracks and gears. Then, I wipe everything down with a damp cloth. For harder-to-reach spots, a small vacuum nozzle works wonders. Once clean, I inspect the rails for any signs of rust or corrosion. If I notice any, I apply a rust inhibitor or use fine-grit sandpaper to clean the area before lubricating.
A little cleaning effort goes a long way toward keeping the slide mechanism smooth and reducing the strain on the motor.
Lubricating Moving Parts
Lubrication is key to ensuring smooth and quiet operation. I use a dry lubricant formulated for RV slide-outs because it doesn’t attract dirt like oily sprays do. Lubricating the moving parts prevents wear and reduces the risk of binding or jamming during operation.
I extend the slide fully, spray the lubricant on the gears, rails, and rollers, then retract and extend the slide a few times to distribute it evenly. I also apply a small amount of lubricant to the seals to help them move smoothly and reduce friction.
I try to avoid over-lubrication since too much product can cause buildup that attracts dirt. A light, even coat every few months or after heavy use keeps everything running smoothly.
Checking Alignment and Operation
Slide-outs rely on proper alignment to function efficiently. If they become misaligned, you might notice uneven extension, grinding noises, or difficulty retracting. Misalignment can happen from uneven parking surfaces, excessive weight, or worn components.
I always make sure the RV is level before extending or retracting the slide-outs. This small precaution prevents unnecessary stress on the mechanism. If I ever notice a slide-out not sitting flush or moving unevenly, I inspect the tracks and supports. Sometimes, tightening a loose bolt or adjusting the roller height fixes the issue.
However, for major alignment issues, I recommend having a professional inspect the system. A technician can check the frame and motor alignment to ensure that no deeper mechanical problems exist.
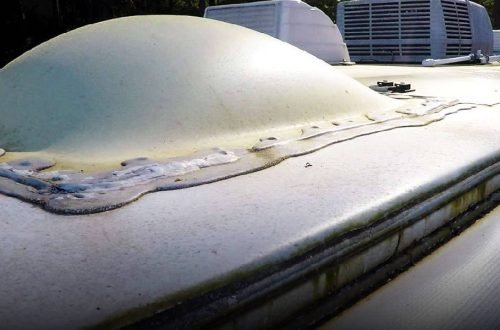
Keeping the Roof and Topper Clean
The roof of the slide-out collects debris, leaves, and twigs, especially when parked under trees. If that debris isn’t cleared before retracting the slide, it can damage the seals or scratch the sidewalls. I make it a point to inspect and clean the top of each slide before bringing it in.
A small ladder and a soft broom or leaf blower make this job quick and easy. For extra protection, I installed slide toppers, which are retractable awnings that cover the top of the slide when extended. These toppers prevent debris accumulation and protect against rainwater pooling on the slide roof.
I also clean the toppers occasionally with mild soap and water to prevent mold or mildew from forming. Keeping the roof and toppers clean not only maintains appearance but also prevents unnecessary wear on the seals.
Monitoring the Slide-Out Motor and Electrical System
Since slide-outs rely on electric motors, keeping the electrical system in good shape is essential. I listen for changes in sound when operating the slides, a struggling motor or grinding noise can signal an issue. It’s better to address these warning signs early than to wait until the motor fails completely.
I inspect the wiring and connections for corrosion or loose fittings. Corrosion around terminals can interrupt power flow and cause the motor to work harder than necessary. Cleaning the terminals with a contact cleaner and applying dielectric grease helps maintain a solid electrical connection.
If the slides run slower than usual, I check the RV’s battery levels, as weak power can affect the slide performance. In most cases, keeping the batteries fully charged resolves the problem.
Preventing Water Damage Around the Slide-Outs
Water is one of the biggest threats to slide-out longevity. Even with healthy seals, water can find its way into cracks or around the edges if maintenance is ignored. I make it part of my regular inspection routine to look for any signs of water intrusion, soft spots on the floor, discoloration on the walls, or musty odors.
To prevent water pooling, I check that the RV is slightly tilted away from the slide side when parked, allowing rainwater to run off instead of collecting near the seals. I also inspect the sealant around the slide corners and reapply caulking if it begins to crack or peel.
During rainy trips, I wipe down the slide walls before retracting them. Trapped moisture can create mildew and slowly damage the structure if left unchecked.
Avoiding Overloading and Misuse
Weight distribution plays a huge role in maintaining slide-out health. Slide-outs are designed to carry a specific amount of weight, and exceeding that limit can cause mechanical stress or misalignment. I make sure not to store heavy items like water jugs or large appliances on extended slides.
I also avoid extending or retracting the slide while people are inside it. The extra weight can throw off the alignment and cause the motor to strain. Similarly, I never move the RV with the slides extended, even a short distance, as it can damage the gears or shear pins.
Using slide-outs correctly and within their intended limits keeps them functional for years.
Seasonal Maintenance Routine
I’ve developed a seasonal maintenance routine that keeps my slide-outs working year-round. Before summer trips, I inspect and lubricate the system, check alignment, and condition the seals. During fall, I pay extra attention to cleaning and sealing to prepare for moisture-heavy conditions.
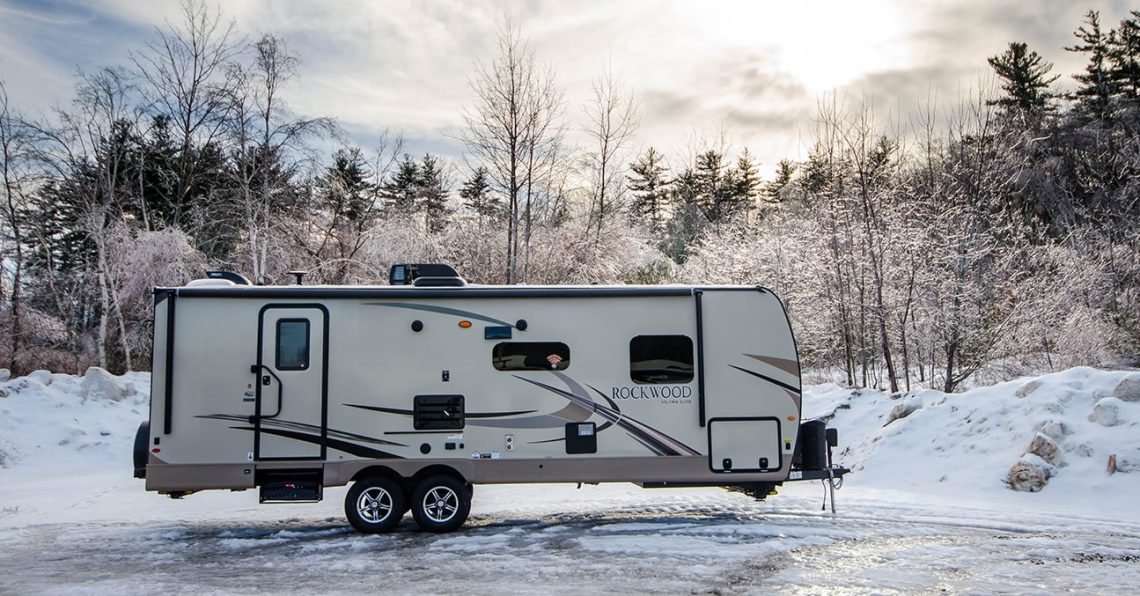
In winter, if I store the RV, I retract the slides fully to prevent weather exposure and protect the seals. Before storage, I clean the slide rooms thoroughly and apply a final coat of seal conditioner. When spring comes, I perform a full checkup before heading out again.
This regular rhythm of maintenance ensures that each component gets attention before problems develop.
Troubleshooting Common Slide-Out Problems
Even with proper care, slide-outs can develop minor issues over time. The most common problems I’ve faced include sluggish movement, squeaking, and leaks.
For slow slides, I first check the battery voltage and fuses. If those are fine, I inspect the motor and gears for obstructions or wear. Squeaking usually means the mechanism needs lubrication or has dirt in the tracks. Cleaning and applying a dry lubricant almost always fixes it.
If I spot leaks near the seals, I look for worn or flattened areas and replace the affected sections. I’ve found that addressing small issues immediately prevents them from escalating into expensive repairs.
When to Seek Professional Help
Some slide-out issues go beyond regular maintenance. Electrical malfunctions, broken cables, or hydraulic leaks are best handled by professionals. I’ve learned not to force a stuck slide, doing so can cause further damage. Instead, I stop, inspect what I can, and call a technician if needed.
Having an experienced RV service center inspect the slide-outs annually can also catch hidden problems early. They often check torque settings, frame integrity, and hydraulic fluid levels, ensuring everything is in peak condition.
Long-Term Benefits of Proper Slide-Out Care
Consistent maintenance has made a big difference in the lifespan of my RV’s slide-outs. They extend and retract effortlessly, the seals stay watertight, and the interior remains free from leaks and drafts. Regular care not only improves function but also enhances comfort during camping trips.
Maintaining your slide-outs protects one of your RV’s most valuable features. Whether you use your camper full-time or just for seasonal getaways, a little time invested in care ensures years of reliable performance. By staying proactive, cleaning, lubricating, inspecting, and protecting, you’ll enjoy the spacious comfort of your RV without worrying about breakdowns or costly repairs.
In the end, maintaining RV slide-outs for long life isn’t complicated; it’s simply about staying consistent. Each time I perform these steps, I know I’m preserving the comfort and functionality that make RV living so enjoyable.