RV interiors tend to feel a little dated after a few years on the road, and one of the biggest culprits is the cabinetry. Those brown or off-beige tones that come standard in most RVs can make the space feel dark and old-fashioned. Giving the cabinets a fresh coat of paint can completely transform the interior, making it look brighter, cleaner, and far more modern. It’s one of the most rewarding projects I’ve done in my RV, and the best part is that it doesn’t require professional tools or experience, just patience, preparation, and a bit of creativity.
Why Painting RV Cabinets Makes a Difference
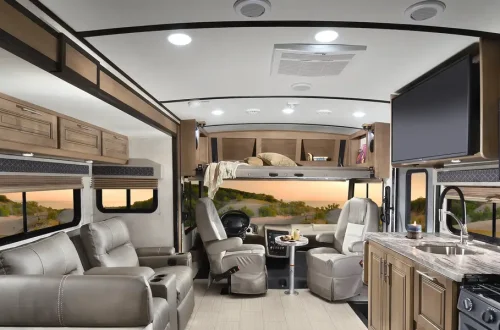
The cabinetry in an RV takes up a surprising amount of visual space. It lines the kitchen, bathroom, and even parts of the living and sleeping areas. When the cabinets are dark or worn, the entire interior feels smaller and older. Painting them a lighter or more modern shade immediately opens up the space and gives it a fresh, personalized touch.
I noticed that once my cabinets were painted, the entire atmosphere of my RV shifted. The walls felt taller, the lighting seemed softer, and the whole space just looked more inviting. It’s an affordable way to achieve a custom look without needing a full renovation.
Preparing the Workspace
Before doing anything else, I cleared out the RV and created a proper workspace. RV interiors are compact, so preparation is key. I started by removing all the cabinet doors and drawers, labeling each piece with masking tape so I could remember where everything belonged later.
To avoid making a mess, I covered the countertops, floors, and nearby furniture with drop cloths and painter’s tape. It’s worth spending extra time protecting surfaces, especially if you plan to spray paint instead of brushing. The confined space means overspray can easily settle on unintended areas.
Good ventilation is crucial. I opened all the windows and roof vents and set up a small fan to circulate air. This not only helped with drying time but also reduced the smell of paint and primer.
Cleaning and Sanding the Cabinets
Proper cleaning is the foundation of a long-lasting paint job. RV cabinets often collect grease, dust, and residue from cooking or travel. I used a degreaser and a sponge to scrub every surface thoroughly, then rinsed it with warm water and let it dry completely.
After cleaning, I lightly sanded each cabinet door and frame using 120-grit sandpaper. The goal isn’t to remove the finish entirely but to create a slightly rough surface for the primer to adhere to. Skipping this step can cause the paint to peel later, especially in humid environments like RV kitchens and bathrooms.
Once I was done sanding, I wiped everything down with a damp cloth to remove dust. This step makes a big difference in how smooth the final coat turns out.
Priming the Cabinets
Primer is what helps the paint stick properly and last longer. I used a bonding primer designed for laminate and wood surfaces since RV cabinets often have mixed materials. Using a small roller and an angled brush, I applied a thin, even coat of primer on every surface.
It’s tempting to go heavy with the primer, but thinner coats dry faster and produce a smoother finish. I let the first coat dry for about four hours before checking for spots I might have missed. Then I applied a second light coat for extra durability.
Once the primer dried, I lightly sanded again with 220-grit sandpaper to knock down any roughness, then wiped everything clean. The cabinets already looked brighter at this point, which gave me a good sense of what the final color might do for the space.
Choosing the Right Paint and Finish
The type of paint you use will determine how professional the result looks. I went with a high-quality acrylic enamel because it’s durable, easy to clean, and dries quickly. In an RV where surfaces get a lot of use, you need something that can withstand moisture and frequent wiping.
For the finish, I chose satin for the kitchen and bathroom cabinets since it offers a soft sheen without being too glossy. Matte finishes tend to show smudges and stains more easily, while high-gloss can make imperfections stand out.
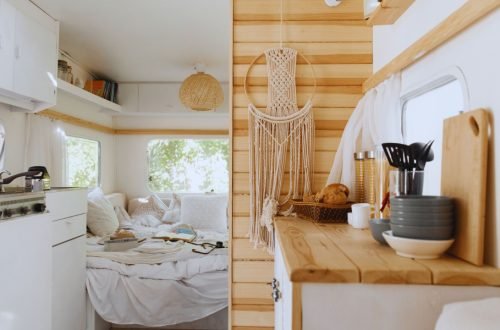
Color choice plays a big role in modernizing the space. Whites and light grays are popular because they make the RV look larger and more open. However, I’ve also seen people pull off two-tone designs, white uppers and navy or forest green lowers, which adds a lot of character without overwhelming the space.
Painting the Cabinets
Once everything was prepped and primed, it was time to paint. I laid the cabinet doors flat on sawhorses and started with the backs first. Using a foam roller for flat surfaces and a brush for corners, I applied the first coat evenly, making sure to follow the direction of the wood grain.
Patience is important here. I let each coat dry for several hours before flipping the doors over to do the other side. Inside the RV, I painted the cabinet frames in place using small, controlled strokes to avoid drips.
After two full coats, I checked for any thin spots or visible brush marks and touched them up. A third coat is optional, but I applied one on the doors that would see the most use, like those under the sink and around the stove.
The drying process can take longer inside an RV due to limited airflow, so I left the windows open and let the paint cure overnight. Rushing to reassemble the cabinets too soon can cause smudges or stickiness.
Reassembling the Cabinets
Once the paint was completely dry, I removed the painter’s tape and began reattaching the hardware. This is a great time to upgrade your cabinet handles and knobs if you want to enhance the modern look even more. I swapped my old brass handles for matte black pulls, and the contrast against the white paint looked incredible.
To make sure everything aligned properly, I followed the labels I had placed earlier and reinstalled the doors one at a time. It’s worth adjusting the hinges carefully to make sure the doors open smoothly and evenly.
Adding Protective Finishes
In high-traffic areas like an RV kitchen, an extra layer of protection helps preserve the paint. I applied a water-based polyurethane topcoat to the cabinet doors for added durability. It gives a subtle sheen and protects against scratches and moisture without turning yellow over time.
I used a foam brush for this step, applying thin, even coats and lightly sanding between each layer. After two coats, the cabinets felt solid and easy to clean, perfect for life on the road.
Enhancing the Look with Details
Painting alone makes a huge difference, but adding small touches can elevate the final result even further. Under-cabinet LED lights, updated hardware, or peel-and-stick backsplash tiles can complement your newly painted cabinets beautifully.
I decided to add LED light strips under my upper cabinets, which created a soft glow over the countertops. It not only improved visibility but also made the kitchen feel cozy and modern at night.
Another great touch is using soft-close hinges if your cabinets don’t already have them. They reduce noise, prevent slamming, and add that upscale feel you often see in newer RV models.
Maintaining the New Finish
Once the cabinets were back in place, I adopted a few simple habits to keep them looking fresh. I wipe them down regularly with a damp cloth and mild soap, avoiding harsh chemicals that could dull the paint.
RV interiors experience more vibration and temperature changes than traditional homes, so minor touch-ups are normal over time. I kept a small jar of leftover paint for quick fixes whenever I noticed small nicks or chips.
If you use a light color, it helps to occasionally polish the surfaces with a soft microfiber cloth to maintain the brightness. It’s a small task that makes a big visual difference.
Common Mistakes to Avoid
Painting RV cabinets isn’t difficult, but there are a few pitfalls to watch for. The most common mistake is skipping the sanding or priming step. Paint may look fine initially, but it will peel or bubble within months, especially in humid conditions.
Another issue is rushing the drying process. Paint takes time to fully cure, and even if it feels dry to the touch, the inner layers may still be soft. Waiting the recommended time between coats ensures a smooth, lasting finish.
Lastly, be mindful of humidity and temperature. Painting on a damp or extremely hot day can affect adhesion and cause streaking. Whenever possible, work in a shaded or climate-controlled area.
The Transformation Experience
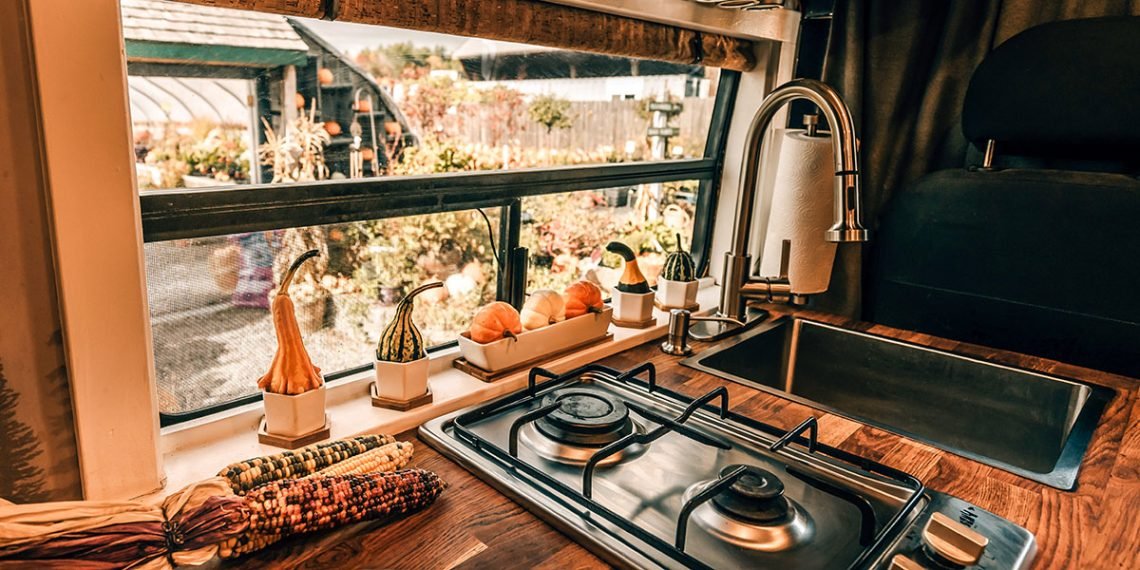
Once I finished my cabinet project, the transformation felt incredible. The old, dark wood tones that once made the RV feel cramped were replaced with bright, modern surfaces that reflected natural light. Cooking and spending time in the kitchen suddenly felt more enjoyable.
It’s hard to overstate how much visual impact painted cabinets can have. They set the tone for the entire space, making it feel newer and more personalized. Guests often comment on how open the interior looks, and it all came from a few days of work and a few cans of paint.
Final Thoughts
Painting RV cabinets is one of the best DIY upgrades you can do for an instant modern look. It’s affordable, beginner-friendly, and completely customizable to your style. Whether you want a sleek white kitchen or a two-tone design with bold color contrasts, the process is straightforward as long as you take your time and follow each step carefully.
The reward goes far beyond appearance. Each time I walk into my RV, I feel a sense of pride knowing that I created a space that reflects my taste and personality. It feels brighter, cleaner, and more like home. With some paint, preparation, and patience, you can transform your own RV cabinets into a modern masterpiece that makes every trip feel fresh again.