Taking care of an RV roof is one of those essential tasks that can easily be overlooked until a leak or crack forces immediate attention. I’ve learned that preventive care, especially for the roof, saves both time and money while preserving the comfort and safety of your RV. No matter how often you travel, the roof endures a lot, from blazing summer heat to heavy rain and snow, and staying ahead of potential problems makes all the difference. Here’s how I handle RV roof maintenance throughout the year, broken down by season, to keep everything in top shape.
Spring: Inspect, Clean, and Seal
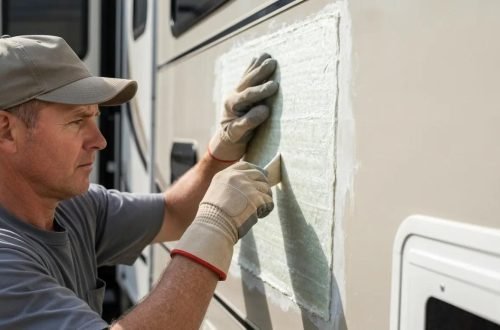
When spring rolls around, it’s the perfect time to inspect the RV roof after a long winter. I start by giving the roof a thorough cleaning. Debris, leaves, and grime can accumulate over time, creating a layer that hides small cracks or punctures. Using a soft brush, mild soap, and water, I scrub gently to avoid damaging the roof material. Once it’s dry, I climb up for a closer inspection.
The next step is looking for any signs of wear. I pay close attention to the seals and seams around vents, skylights, and air conditioning units. These areas tend to be the first to show cracks or peeling. If I notice any weak spots, I apply an RV sealant compatible with my roof material, whether it’s rubber, fiberglass, or aluminum. It’s important not to use household sealants since they might not adhere properly or could cause damage over time.
Spring is also the time I check the roof’s edges. Any loosened trim or worn-out caulking needs immediate attention before summer storms hit. I finish by rinsing everything again to ensure no soap residue remains, as it can attract dust or mold growth later.
Summer: Protect Against Heat and UV Damage
Summer sun can be brutal on RV roofs. UV rays and heat can dry out rubber and make sealants brittle. During this season, I make sure my roof is ready to handle the high temperatures. I start by applying a UV protectant or roof coating specifically made for RVs. This adds a layer of protection that reflects sunlight, reducing heat buildup inside the RV and extending the roof’s lifespan.
I also inspect the air conditioner shroud and vents for any cracks. Since the AC unit works overtime in summer, ensuring its seals are tight prevents water from sneaking in during sudden summer rainstorms. I also like to check the condition of roof accessories like solar panels or satellite dishes, tightening any loose mounts and cleaning around them.
Sometimes, I’ll wash the roof mid-season just to keep dirt and dust from baking onto the surface. A clean roof helps the coating last longer and prevents buildup from clogging drains or gutters. Even though summer maintenance might seem minimal, this is the time when sun exposure can quietly do the most damage, so preventive care pays off.
Fall: Prepare for Rain and Cooler Weather
Fall brings cooler temperatures and more rain, so my focus shifts to waterproofing. I start with another full inspection, paying particular attention to any areas that might have expanded or contracted due to summer heat. The constant expansion and contraction can cause micro-cracks that later develop into leaks.
If I notice any potential weak spots, I reseal them immediately. I’ve found that it’s easier to work with sealant in mild weather before temperatures drop. I also make sure my roof’s drainage system is clear. Blocked gutters or weep holes can cause water to pool on the roof, increasing the risk of leaks or mold.
Leaves are another big issue during fall. They can pile up and trap moisture, so I try to sweep or rinse them off regularly. After everything’s clean, I do a light wash and check the roof edges again. Any metal trims or screws that have loosened during travel get tightened. If I plan to store the RV over winter, I take an extra step by applying a protective conditioner or coating to give the roof an added layer of defense.
Winter: Protect Against Snow, Ice, and Moisture
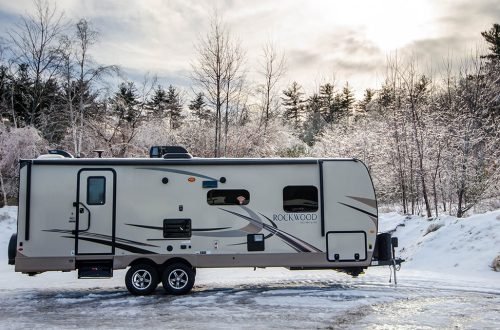
Winter is when the roof faces its toughest test. Snow and ice can put stress on the roof, especially if it’s flat or slightly sloped. I always start by checking the roof before storage. If possible, I park the RV under a covered area or use a breathable RV cover designed for winter conditions. This helps prevent ice buildup and moisture penetration.
If snow accumulates on the roof, I remove it using a soft broom or long-handled brush. It’s crucial to avoid metal tools that can puncture the roof surface. Even a small puncture can become a major problem once melting snow starts seeping in. I also inspect after every heavy storm to make sure no new cracks or leaks have developed.
Another key winter step is maintaining interior ventilation. Moisture inside the RV can rise and cause condensation on the roof’s underside, potentially leading to mold or mildew. I use moisture absorbers and occasionally run a dehumidifier to keep humidity under control. By the time spring arrives, my roof is usually in great shape and ready for another season of adventures.
Tools and Products I Always Keep Handy
Over the years, I’ve learned that having the right tools makes RV roof maintenance a lot easier. I always keep a soft-bristle brush, a bucket, mild detergent, and a hose on hand for cleaning. A good RV roof cleaner and protectant are essential for seasonal upkeep. For sealing, I rely on self-leveling lap sealant for horizontal surfaces and non-sag sealant for vertical seams.
A sturdy ladder is another must-have, along with a microfiber mop for gentle cleaning in hard-to-reach spots. I also keep a caulking gun, a roll of roof repair tape, and rubber gloves for any quick fixes while on the road. These items have saved me from unexpected leaks more than once during long trips.
How to Spot Early Signs of Roof Trouble
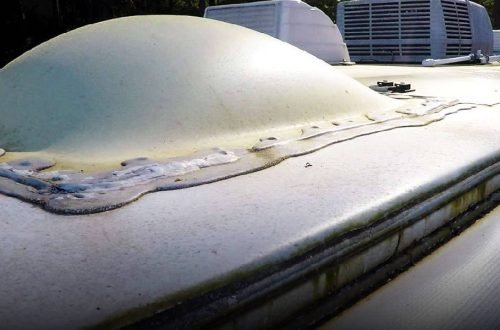
Catching problems early can prevent major repairs later. I’ve trained myself to look for discoloration or bubbles on the roof surface, which can indicate trapped moisture. Any soft or spongy spots underfoot mean water has already seeped beneath the material. Inside the RV, I look for brown stains on the ceiling or around vents, as these are classic signs of a leak.
I also pay attention to the smell. A musty odor often hints at water damage hidden behind panels or insulation. If I find anything suspicious, I don’t delay repairs. A simple patch or reseal now can save me from a costly roof replacement down the line.
Seasonal Maintenance Schedule
To make sure I never skip a step, I follow a simple yearly schedule. In spring, I deep clean, inspect, and reseal. During summer, I apply UV protection and check for sun damage. Come fall, I focus on waterproofing and leaf removal. In winter, I keep the roof clear of snow and ensure proper ventilation. This routine has kept my RV roof strong and leak-free through all kinds of weather.
It’s easy to underestimate the impact of regular maintenance, but neglecting the roof can lead to costly water damage inside the RV. The more consistent I am with inspections, the fewer surprises I face during trips.
Long-Term Care and Roof Longevity
A well-maintained RV roof can last for many years, even decades, depending on the material. Rubber roofs usually last about 10 to 15 years, while fiberglass and aluminum can last longer with proper care. The secret lies in preventing buildup and exposure. I try to park the RV under shade whenever possible and avoid harsh cleaning chemicals that can weaken the surface.
I also make it a habit to reapply protective coatings every two to three years. This not only enhances durability but also helps reflect heat, keeping the RV cooler inside during summer trips. Over time, I’ve realized that taking a few hours each season for maintenance is far easier than dealing with costly repairs later.
Safety Tips for Roof Work
Working on an RV roof can be risky, especially if it’s wet or sloped. I always make sure the surface is dry before climbing up. I wear shoes with good grip and use a spotter when possible. For added stability, I place foam pads or crawl boards under my knees to distribute weight evenly and avoid denting the roof.
If I need to do extensive work, I prefer using a stable ladder instead of walking on the roof for long periods. Safety should always come first, especially when working at height or dealing with slippery conditions.
Final Thoughts
Maintaining an RV roof may not be the most exciting part of the lifestyle, but it’s one of the most important. A clean, sealed, and well-protected roof keeps the rest of the RV in good condition, ensuring that every journey is comfortable and worry-free. By breaking the work into seasonal tasks, I’ve made it part of my regular travel rhythm instead of a daunting chore.
Each season brings new challenges, but with the right routine, your RV roof can handle them all. The key is consistency, clean it, inspect it, and protect it year-round. The peace of mind that comes from knowing your roof is solid makes every mile on the road that much more enjoyable.